Pages

Showing posts with label sandwiches. Show all posts

Monday, August 19, 2013

Things You Must Try

During my hiatus, I haven't used my fancy camera one time.  Part of that is my frustration with not being able to quickly master it and part of it is just taking a much needed break.  As I tell my children, sometimes if you go away from something for a while, when you try again it's suddenly easier.  It's like clearing your brain, if you will.  I'm hoping that will happen with my photography skills.  I do know I don't practice often enough.  Again, something that I preach to my children almost daily.  Man this parenting thing sure does teach you a lot of what you're not doing as an individual!

Even though I don't have my own pictures, I've provided a link to the original photo to give proper credit.  Original pictures or not, I had to share some of our favorite recipes from the last couple of months.  There's a little something for everyone, I hope, so be inspired to try something new!

Let's start with dessert first, shall we?  I made this cake for my mom's birthday and it's one of my all-time favorites (and I've made a LOT of cakes!).  The only part I don't like is that you have to put the cake in the refrigerator to help set the whipped cream frosting in between the layers.  I just don't like the way the fridge dries out the crumb and makes it a little less moist, but even still the flavors of the cake make you forget about the texture of the cake.  She suggests Valencia oranges and after trying them, I second that suggestion. Navel oranges just don't have the powerful sweet orange taste like the Valencia ones.  She also talks about various butters and I used an Irish butter to give some extra richness to the cake.  Just don't use the cheap stuff and you should be good.  I didn't get a chance to do the fancy icing technique because I don't do artificial colors, but you should still watch her video of how she achieves such a beautiful pastel swirl.  It's almost too pretty to eat.  Almost.  
Orange Party Cake with Whipped Orange Frosting
via Sweetapolita

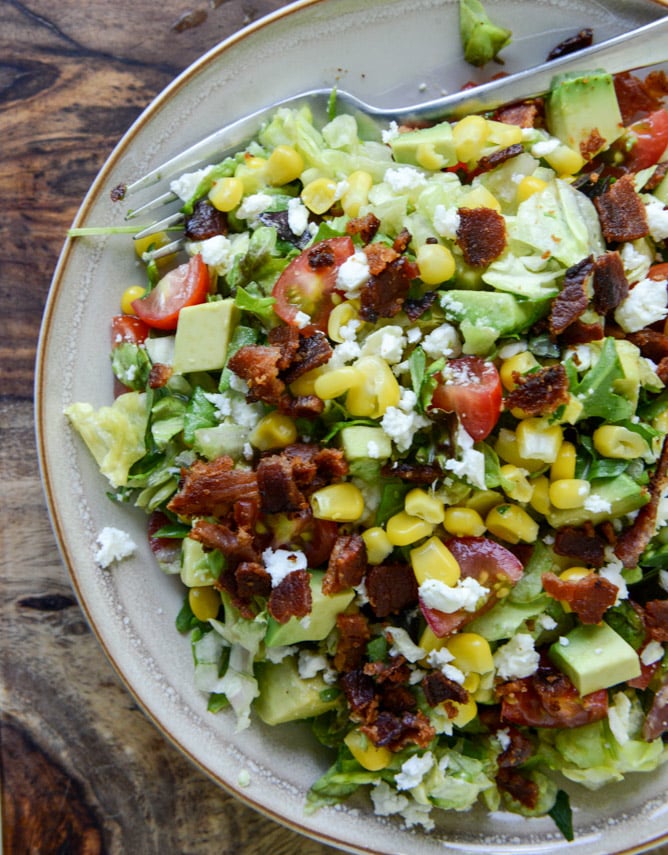
For a slightly healthier meal, might I suggest this BLT Chopped Salad with Corn, Feta & Avocado.  Seriously, it's everything I love all wrapped up in a giant bowl.  It's got both the crunch of the bacon and corn, as well as the creaminess of the avocado and feta.  Summer on a plate!

BLT Chopped Salad
via How Sweet It Is
Another delicious salad is this Thai Chopped Chicken Salad.  I omitted the edamame, but even without it was very filling and hearty.  I missed where the peanut sauce was supposed to be different from the dressing, so I just piled them all together in a mason jar and shook away.  I can't say what they taste like apart, but it's mighty tasty all blended together.

Thai Chopped Chicken Salad
via Taste and Tell
If you want to channel your inner-90 year old granny, this recipe for Homemade Chicken 'n' Dumplings is the way to go.  Seriously people, this is where it's at.  I have been dreaming of this big bowl of goodness ever since I made it nearly a month ago.  I made it as a surprise for Wes since he often feels our meals are too healthy (is there such a thing?!).  We were both pleasantly surprised how authentically awesome these dumplings were.  Now don't get discouraged that these are from scratch.  As Jenna points out, from start to finish this entire dish takes about 30 minutes.  You couldn't even park and get waited on at Cracker Barrel in that amount of time.  Plus as a bonus, you know what's in it (or not in it).  

Homemade Chicken 'n' Dumplings
via Eat, Live, Run
For a few vegetarian and vegan options, the next 4 are incredible!  I honestly couldn't pick a favorite because they're all great in their own right.  The French Onion Burger from the Curvy Carrot is full of flavor and one of the "meatiest" veggie burgers I've ever made.  It holds together well and doesn't smoosh into 100 pieces when you take the first bite.  The boys didn't even know it wasn't a traditional burger.  I served them on a pretzel roll from Trader Joe's and I'm now in love with those buns!  I'm a sucker for anything with caramelized onions, so this one had my name written all over it.  I couldn't lift the picture from her site.  Smarty pants!   

Wes requested a Bahn Mi type sandwich one week and even added that it could be vegetarian.  Not one to ignore a good challenge, I set off to find the best recipe.  And boy did I?!  There are many components to this sandwich, just as there are for a traditional Bahn Mi, but each one is an integral part of the overall goodness of the sandwich.  The mushroom pate would be great on a burger.  The only modification I'd make in the future would be to halve or even third the pickled vegetables.  They do keep for up to a month, but I had difficulties finding other uses for them.  I did enjoy the Daikon, as this was the first time I think I'd ever had one.  Crusty bread is another must to help absorb some of the wetness from the pate and veggies.  We went the egg route, as opposed to the tofu.

Vegetarian Bahn Mi Sandwich
via The Chubby Vegetarian
Another vegetarian meal that I would bet you wouldn't miss the meat is this hearty Chickpea Crockpot Pie with Biscuit Topping.  If you haven't noticed by now, we like bread.  Really it's me and I've passed on my affection to everyone else since I'm the cook.  These biscuits, although vegan, are the bomb!  I think the moisture from the crockpot helps a lot, as does the creamy broth and veggies sticking to the underside of each bite of the biscuit.  It's a match made in heaven.  Everyone was asking for seconds and were fighting for the leftovers.

Chickpea Crockpot Pie with Biscuit Topping
via Peas and Thank You

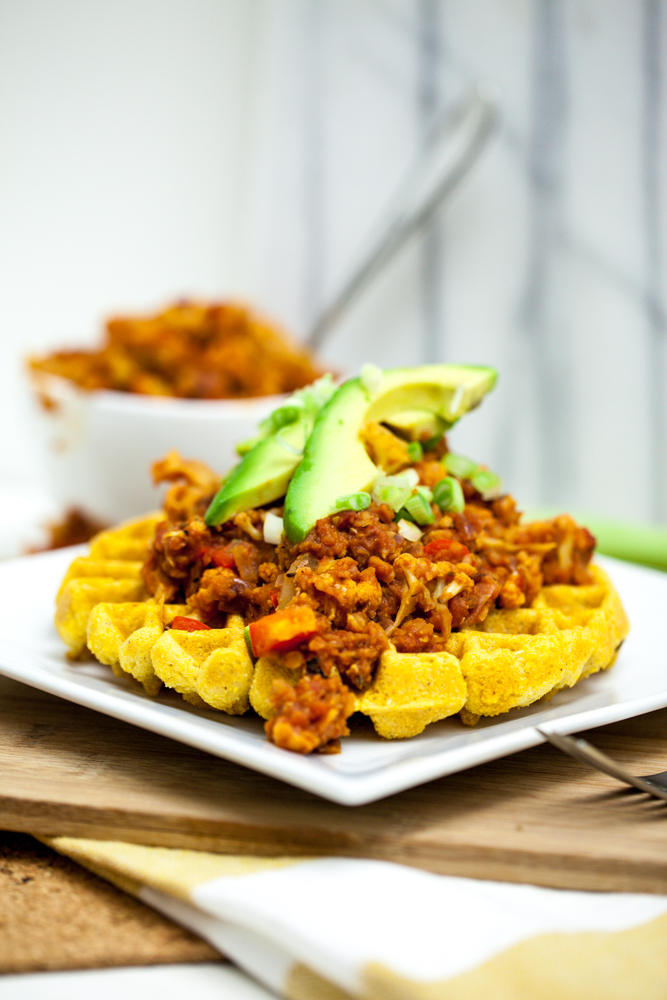
The last recipe may be a bit of a stretch for you.  Just trust me, it really it quite tasty.  Your kids will love that they get to eat a waffle and you'll love that said waffle is packed with nutrients.  Again, don't let the laundry list of ingredients overwhelm you.  Most of them are spices and all together it only takes about 30 minutes to prepare.  The cauliflower gets chopped up, so the mouths you are feeding are none the wiser that they're actually eating something healthy.  Honestly, I think I liked this one more than Wes, but he's funny on the texture of his food.  He needs some crunch in every meal and, well, this meal is lacking in that department.  He also doesn't like anything with the word "sloppy" in it because he said it automatically sounds unappealing.  I guess I see it.  The boys and I loved it though.

Cheesy Cornbread Waffles with Cauliflower Lentil Sloppy Joes
via Keepin' It Kind

Phew!  I'm hungry now.  Doing a big post like this makes me realize just how many meals have come out of my kitchen in the last 3 months.  Which one are you going to try first?  That is if you're not in a food coma by now!

 
Photobucket

Tuesday, April 23, 2013

Crispy Creole Fish Sandwiches


While we're on the topic of sandwiches, I thought I'd share another one of our favorites with you.  There's just something about all the toppings that go on a sandwich that makes my little heart go pitter-patter.  I love the crunch of the lettuce, the way all the condiments blend together, and the way the cheese melts over and seals everything in place.  Yes, please, I'll have one now!

This fish sandwich is not for the spice intolerant.  But it can easily be tamed down (or up!).  My kids ate the fish, as is, but without the spicy remoulade.  I appreciate that the spice gives it flavor without having the extra calories and gunk from frying.  I hope you'll agree!

Crispy Creole Fish Sandwich
Ingredients:

For the remoulade:

1/2 cup vegannaise (or regular mayo)
2 T. spicy brown mustard
2 T. dill pickle, diced (or relish)
2 T. shallots, finely chopped
1 tsp Sriracha
1 tsp creole/cajun seasoning
juice of 1 lemon

For the fish:

1 egg
1/2 cup milk 
1/2 tsp Sriracha, or your favorite hot sauce
1/2 cup cornmeal
1/2 cup flour
1 T. creole/cajun seasoning
4 large tilapia filets, or other mild white fish
1/3 cup canola oil

For the sandwiches:

8 slices whole wheat bread
1 tomata
Romaine lettuce
Pepperjack cheese, sliced

Directions:

For the remoulade:  Combine all ingredients in a small bowl and stir to combine.  Cover and refrigerate until ready to use.  Can be made up to 2 days prior.

For the fish:  Add enough canola oil to cover the bottom of a large skillet or saute pan.  Heat over med-high heat until a drop of water sizzles when dropped into the oil.  While the pan heats, mix the egg, milk, and Sriracha in a shallow dish large enough to hold a piece of the fish.  Then add the cornmeal, flour, and creole seasoning to a large zip-top bag.  Shake well to combine.  

Dredge each filet in the egg wash and then add to the zip-top bag.  Shake well to coat each filet.  Add each filet to the hot oil and fry on each side until golden brown, about 4 minutes per side.  Remove to a paper towel-lined plate to blot some of the oil.  Add salt and pepper to taste.  Finally, top with pepperjack cheese so it can start melting.

For the sandwiches:  To assemble the sandwiches, spread one remoulade on 4 slices of the bread.  Top with lettuce, tomato, 1 fish filet with cheese, and the other piece of bread.  

**Linking up with What's Cookin' Wednesday and Whole Foods Wednesday.

Photobucket

Thursday, April 18, 2013

Avocado Chicken Salad Sandwiches


Now that spring seems to have finally sprung in the Bluegrass, my brain has totally switched gears and is in full on warm weather food.  Pasta salads, sandwiches, cold grain salads, and grilling just to name a few.  

We enjoyed this sandwich several weeks ago when I'm sure the weather wasn't so warm, but we devoured it nonetheless.  It's just simple and refreshing and allows each ingredient to be tasted individually.  We have become huge avocado fans, so anything with that luscious green melty flesh in it is a winner in our book!

One drawback is that the chicken salad is best enjoyed the day you make it.  As with most dishes involving avocados, they tend to brown the longer they're cut.  It's a shame really because I love leftovers!  With this recipe though, there weren't any leftovers to speak of, so this was not an issue.

Avocado Chicken Salad Sandwiches
{printable recipe}
Ingredients:

1 lb boneless, skinless chicken breast
1 ripe avocado
2-3 T. non-fat, plain Greek yogurt
Juice of 1/2 lemon
1/4 c walnuts, toasted and chopped
8 slices whole wheat sandwich bread
romaine lettuce (optional)
sliced tomatoes (optional)
In a medium saucepan, boil chicken in enough water to cover generously.  Once boiling, add a teaspoon of salt and pepper, cover and reduce heat to low.  Allow to cook for 10 minutes.  Remove from heat and allow to cool.  Once cool, shred chicken with your fingers or 2 forks, into a medium-sized bowl.  

Cut the avocado into cubes and add to the chicken along with the yogurt, lemon juice, and walnuts.  Toss well to combine and to "mush" up the avocado so that it mixes with the yogurt to coat everything.

Spread the chicken salad onto each of the rolls and top with the romaine and tomato as desired.

**Linking up with What's Cookin' Wednesday.
Photobucket

Thursday, March 14, 2013

Portabello Burger

Although you don't really need a recipe for a portabello burger, sometimes I appreciate the inspiration when I'm trying to think of something different, yet easy, for dinner.  

Mushrooms pack a hefty protein punch, as well as contributing to a wide range of essential amino acids.  Not to mention they're fat free and only have about 20 calories.  That allows for more flexibility and wiggle room with your toppings!

Portabello Burgers
serves 4
{print recipe}

For the mushrooms:
4 large portabello mushroom caps, rinsed and gills removed
1 T. extra virgin olive oil
3 T. balsamic vinegar
1 tsp dried basil

For the sandwiches:
1 large roasted bell pepper
1 medium beefsteak tomato
1-2 cups fresh torn spinach leaves
1/2 cup alfalfa/brocoflower sprouts
2 oz goat cheese, at room temperature
sun-dried tomato spread or grain mustard
4 whole wheat buns

Directions:
Clean and dry portabello caps and spoon out the gills from the underside.  Place caps in a large resealable bag and add olive oil, balsamic vinegar, and dried basil.  Marinate for 20-30 minutes.

Prepare grill pan over medium-high heat.  Remove caps from bag, discarding marinade.  Grill 3-4 minutes on each side, or until mushrooms have shrunk in size and become soft.

Assemble the sandwiches by spreading goat cheese on one side of each sandwich.  Spread sun-dried tomato spread or grain mustard on opposite side of bun.  Place the spinach leaves on top of the goat cheese to give them something to stick to (sounds silly but I hate when things fall off my bun!).  Top with tomato, roasted pepper, sprouts, and finally portabello caps.  


Photobucket

Thursday, February 28, 2013

Garlicky Shrimp Avocado Sandwiches


I love when a recipe tastes as good as it looks.  There's nothing worse than looking forward to a dish, only for it to totally disappoint you.  And when the recipe is quick and easy, yet still makes a beautiful presentation, it's a win-win in my book!

This recipe fits into both categories.  I'm not sure why I ever lived under the avocado rock, but I did and I'm making up for lost time.  I don't think I ever even tasted an avocado until a few years ago.  It's creamy, delicate, and oh so healthy.  I buy at least one a week now!

Wes' favorite breakfast is a piece of toast smeared with fresh avocado, topped with a pinch of salt.  Sounds simple but he looks forward to it every day.  I knew this recipe had his name written all over it and I was right.  We both loved it!  

I chose to use Everything Buns from Trader Joe's and while they were fine, I think I'd prefer something with a little more give.  Once toasted, these became giant croutons and were a little crumbly to eat.  That didn't stop me from cleaning my plate, but if I was around civilization, I might care a little more :)


Garlicky Shrimp Avocado Sandwiches
from:  Annie's Eats

{Print recipe!}

Ingredients:
2 ripe avocados
juice of 1 lime
1/2 tsp salt
4 slices crusty Artisan bread
10-12 oz. medium-sized shrimp, peeled and deveined
2 T. olive oil, plus more for brushing
3/4 tsp red pepper flakes
2-3 garlic cloves, finely minced
salt and pepper, to taste
pea shoots or sprouts, for garnish

Directions:
Preheat the broiler.  Remove the pits from the avocados and and scoop the flesh into a medium bowl.  Coarsely mash with a fork.  Add in the lime juice and salt and continue to mash until the mixture has reached your desired consistency.

Place slices of bread on a baking sheet, brush lightly with olive oil, and place underneath the broiler until just slightly charred, about 2 minutes.  Remove from the oven and allow to cool slightly.  Spread each piece with a layer of the avocado spread.  Sprinkle lightly with sea salt.

Place the oil in a large skillet over medium-low heat and add the red pepper flakes and garlic to the oil.  Let warm slowly, about 5 minutes, to infuse the oil with the flavor of the red pepper and garlic.  After 5 minutes, increase the heat to medium-high.  Add the shrimp to the pan in a single layer.  Let cook until just pink on the bottom side.  Flip with tongs and let cook about 1 minute more, just until the shrimp are opaque and cooked throughout.  Season with salt and pepper to taste.  Remove from the heat.  Toss lightly to coat with the garlic oil.  Let cool briefly.  Layer the shrimp over the avocado spread on the bread.  Top each serving with a small handful of pea shoots or sprouts.  


Photobucket

Monday, August 6, 2012

Weekly Recipe: Maple Sweet Potato Pecan Burgers

I think I've finally found a good dinnertime routine that allows me to escape the overwhelmed feeling.  I'm not sure if it's because I've learned to only select recipes that are fairly quick, if it's because I shaved a good 15-20 minutes off my commute, or if I've just gotten more immune to it, but I'm totally digging it!  Hello?  It only took me 5 years.  Better late than never!
In our continuing quest towards a vegan diet, I'm always looking for entree selections.  The side dishes are a dime a dozen but my family still desires a traditional main dish, 2 side plate (or maybe that's just me!).  Veggie burgers are everywhere in the blogosphere but I'm partial to the ones containing sweet potatoes for some reason.  I think it's because Shaun T told Doctor Oz that he thought people should eat sweet potatoes 3 times a day and now that is ingrained in my brain!  I also love the taste of them and the burgers are easy to prepare ahead of time, as are most veggie burgers.
This recipe did not disappoint.  I love that there are so many nutrients packed in each patty.  I was able to sneak in kale without Sawyer protesting but Colin is in the investigative stage and picks apart everything on his plate before eating it.  Never fear, he generally still eats it all but he's not crazy about things he can't separate, including this burger.  
I do wish they got a little more firm upon baking but having had lots of experience with this type of burger, I know there probably wasn't enough dry ingredients to soak up all the moisture from the sweet potatoes.  I'm not one to add a bunch of filler for the sake of adding it but maybe some wheat germ or flax meal would help the cause.  I also made these up the day before, baked them first, and then finished them in the skillet.  Again, a lot of practice has proved this to be the best way for me.  And don't skip the onion topping, they really take it to the next level and give that little crunch.  
 
Maple Sweet Potato Pecan Burgers
from: The Tolerant Vegan
Ingredients:
  • 2 cups peeled, cooked and mashed sweet potatoes
  • 1/4 cup uncooked quinoa
  • 3/4 cup water
  • 2 tablespoons Earth Balance Natural Buttery Spread or another vegan butter substitute
  • 2 tablespoons maple syrup
  • 1/8 teaspoon cayenne pepper
  • 1/2 cup dry roasted pecans, chopped
  • 1 cup chopped kale
  • 1/2 teaspoon sea salt (plus a sprinkle for the onion topping)
  • 1 Vidalia onion
  • sprinkle of fresh ground black pepper
  • 4 buns of your choice

Directions:
  1. To make the burgers, preheat your oven to 400 degrees Fahrenheit.
  2. Since sweet potatoes come in all shapes and sizes, I opted to include a measurement of the potatoes already cooked and mashed rather than a total number of sweet potatoes to use. I ended up using three small potatoes for this recipe. I microwaved them until soft, then removed the skin and mashed them with a fork in a large bowl.
  3. While your potatoes are cooking, bring the water and quinoa to a boil in a small saucepan.
  4. Turn the heat down to a low simmer and cover the saucepan, allowing the quinoa to cook for 8-10 minutes. Check the quinoa every couple of minutes since stove temperatures vary. It may cook faster or slower than expected. You’ll know it’s done when the water is almost gone from the pan and the quinoa appears to be nearly transparent instead of its original whitish color.
  5. Remove the quinoa from the stove and allow to sit, covered, for 5 minutes.
  6. In a separate saucepan, or in a microwave, melt 1 tablespoon of the vegan butter.
  7. Stir in 1 tablespoon of maple syrup and the cayenne pepper.
  8. Stir the maple syrup sauce in with the mashed sweet potatoes
  9. Then stir in the the cooked quinoa, pecans, kale and sea salt.
  10. Form the mixture into four patties and place on a baking sheet.  (I refrigerated mine overnight.)
  11. Bake for 45 minutes, turning once at the halfway point.  (I then quickly pan fried them for about 5 minutes on each side to try to give them a little more texture.)
  12. When the burgers have around 15 minutes left to cook, make the onion topping by first roughly chopping the Vidalia onion.
  13. Melt the remaining 1 tablespoon of vegan butter in a small skillet over medium heat.
  14. Add the onion to the melted butter
  15. Sprinkle with sea salt and fresh ground black pepper
  16. Cook for 12 minutes, stirring occasionally.
  17. Turn the heat down to low and pour in the remaining 1 tablespoon of maple syrup.
  18. Stir continuously as the onions continue to cook for 3 more minutes.
  19. Remove the onion mixture from the heat and spoon over the tops of the burgers once they have finished baking.
Photobucket

Monday, July 30, 2012

Weekly Recipe: Chik-fil-gay Sandwiches


Yesterday was Sunday, right?  You know how you always get a Chik-fil-a craving on Sunday?  Well I did the unthinkable, I had Chik-fil-a on Sunday!  How you ask?  I made my very own Chik-fil-gay sandwiches!  
I'm not even going to touch on their headline debate.  I like chicken and I like gays, so here's my way to accept both (:
I wish I could take credit for the clever name, but alas, it was Hilah who coined the term in her video tutorial of how to make a copycat version of the sandwich.  Her video inspired me to give it a try and I have to say, they were pretty darn close to the real thing.  I read another (serious) article today about someone trying to perfect the process and I was able to get a few tips for my next attempt.  And oh yes, there will be a next attempt!  
I even tried to create a vegan version by following the same procedures, just using tempeh.  I'm having it for lunch today so I'll report back as to the taste.  In the meantime, please enjoy.  It's been "my pleasure" to bring this to you today.
Oh and this was the perfect meal for my dear son, Colin, because the meal told a tale of his future.  You see, when he grows up, he's going to live right around the corner from us (a house that is currently for sale), work at Whole Foods and only eat vegetables and drink water because that's what's healthy.  He said the only restaurant he will go to occasionally is Chik-fil-a but only sometimes.  I think I've driven the vegetable message home, what do you think?
Chik-Fil-Gay Sandwiches
from Hilah Cooking
2 boneless chicken breasts
2/3 cup pickle juice (dill is my preference)
1 large egg
1/4 cup milk
2/3 cup flour
1 1/2 T. powdered sugar
3/4 tsp paprika
1/2 tsp salt
1/2 tsp pepper
1/2 tsp garlic powder
1/4 tsp celery salt
1/2 tsp dried basil
1 cup peanut oil
pickle slices
bun
  1. Wrap the chicken loosely between plastic wrap and pound gently with the flat side of a meat tenderizer until about 1/2 inch thick all around.
  2. Cut each breast into two pieces, as even as possible.
  3. Marinate in the pickle juice for 30 minutes to one hour (add a teaspoon of Tabasco sauce now for a spicy sandwich).
  4. Beat the egg with the milk in a bowl.
  5. Combine the flour, sugar, and spices in another bowl.
  6. Dip the chicken pieces each into the egg on both sides, then coat in flour on both sides.
  7. Heat the oil in a skillet (1/2 inch deep) to about 345-350.
  8. Fry each cutlet for 2 minutes on each side, or until golden and cooked through.
  9. Blot on paper and serve on toasted buns with pickle slices.
Linking up to Jam Hands.
Photobucket

Thursday, April 5, 2012

Weekly Recipe: Tequila Chicken Sandwiches

I'm playing catch up a bit with my recipes.  I've lost the desire to photograph any new recipes because I'm so back logged with older ones!  In an effort to get out of that funk, I'm going to try to get with it and clear out some of these delicious delights with you.  

First up is a sandwich creation from one of my Secret Recipe Club assignments, Kita, of Pass the Sushi.  I love finding new food blogs and love even more when I love nearly every single one of their creations!  I've had to limit myself to only bookmark the ones I truly think I might make.  Kita is also has amazing photography skills, so I like to keep coming back to try to get some tips from her!

This sandwich sounded a bit odd in the making but once it hit my taste buds, it was weird no more.  Looking back at her pictures, I may have done something wrong in terms of quantities, but I assure you these sandwiches were not affected!  They were deliciously creamy, yet crunchy at the same time from the peppers.  The tequila was a perfect kick that ramped up the flavor.  I loved that they were cooked in a little foil pack but I admit to have a few trials and tribulations with the little boogers.  Next time, I think I'll omit the whole flipping step and just bake on one side - either that or not be so stingy with my aluminum foil and actually follow the folding directions.  


Tequila Chicken Sandwiches
as posted on Pass the Sushi (originally from Food Network Magazine)


  • ¼ cup extra-virgin olive oil
  • 1 cup julienned red onion (I only used 1/3 cup)
  • 1 T mined jalapeno pepper
  • ½ cup julienned roasted red bell pepper
  • 1 double chicken breast, cooked and shredded
  • Salt and Pepper
  • 1 T chopped garlic
  • 2 T chopped fresh cilantro, plus more for garnish
  • 4 ounces cream cheese
  • ¼ cup grated parmesan cheese, plus more for topping
  • 1 ¼ cup grated mozzarella cheese
  • ¼ cup lime juice
  • 3 ounces tequila
  • ¼ cup diced roma tomatoes, for topping
  • 4 sourdough rolls or bread, warmed
 
Layer two 15-inch sheets of heavy duty foil and fold them together around the edges to create on sheet. Repeat to make a second double-layered sheet of foil. Bend the edges of one of the sheets up 2 inches and crimp the corners so it can hold liquid.

In order, layer these ingredients on the bent sheet of foil: olive oil, onion, jalapeno, bell pepper, chicken, ¼ teas salt, 1 teas pepper, garlic, cilantro, cheeses, lime juice and tequila. Place the second double-layered foil sheet on top of the ingredients and fold the top and bottom sheets together on all sides. Make sure the packed is not leaking, then refrigerate until ready to cook.

Preheat the oven to 250 degrees F or a grill to medium and place the foil packet in the oven or on the grill. Cook 10 minutes; flip and cook 10 more minutes. Slice the bag open and top with the tomatoes, cilantro and parmesan cheese. Serve on warmed rolls.


Photobucket