Pages

Showing posts with label Desserts. Show all posts

Monday, August 19, 2013

Things You Must Try

During my hiatus, I haven't used my fancy camera one time.  Part of that is my frustration with not being able to quickly master it and part of it is just taking a much needed break.  As I tell my children, sometimes if you go away from something for a while, when you try again it's suddenly easier.  It's like clearing your brain, if you will.  I'm hoping that will happen with my photography skills.  I do know I don't practice often enough.  Again, something that I preach to my children almost daily.  Man this parenting thing sure does teach you a lot of what you're not doing as an individual!

Even though I don't have my own pictures, I've provided a link to the original photo to give proper credit.  Original pictures or not, I had to share some of our favorite recipes from the last couple of months.  There's a little something for everyone, I hope, so be inspired to try something new!

Let's start with dessert first, shall we?  I made this cake for my mom's birthday and it's one of my all-time favorites (and I've made a LOT of cakes!).  The only part I don't like is that you have to put the cake in the refrigerator to help set the whipped cream frosting in between the layers.  I just don't like the way the fridge dries out the crumb and makes it a little less moist, but even still the flavors of the cake make you forget about the texture of the cake.  She suggests Valencia oranges and after trying them, I second that suggestion. Navel oranges just don't have the powerful sweet orange taste like the Valencia ones.  She also talks about various butters and I used an Irish butter to give some extra richness to the cake.  Just don't use the cheap stuff and you should be good.  I didn't get a chance to do the fancy icing technique because I don't do artificial colors, but you should still watch her video of how she achieves such a beautiful pastel swirl.  It's almost too pretty to eat.  Almost.  
Orange Party Cake with Whipped Orange Frosting
via Sweetapolita

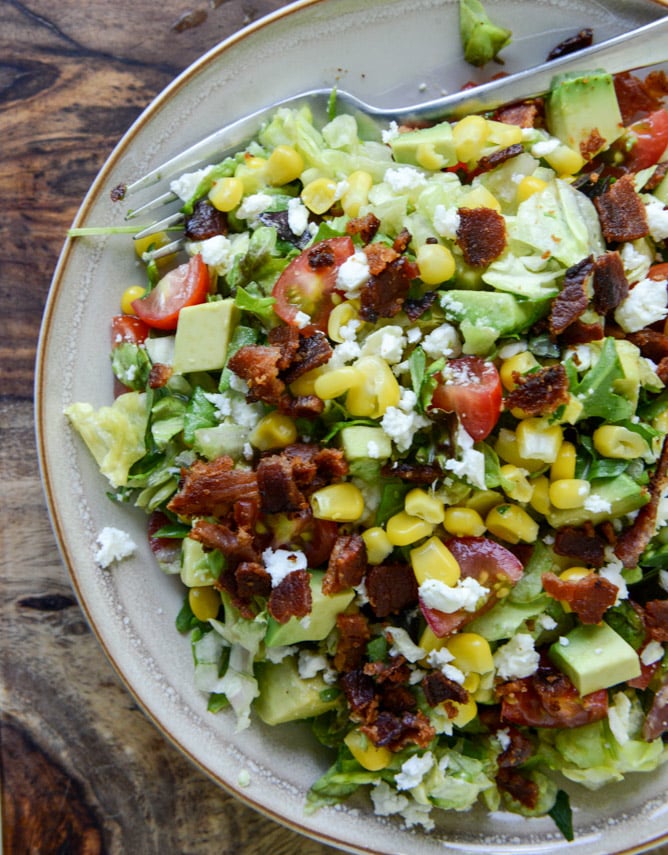
For a slightly healthier meal, might I suggest this BLT Chopped Salad with Corn, Feta & Avocado.  Seriously, it's everything I love all wrapped up in a giant bowl.  It's got both the crunch of the bacon and corn, as well as the creaminess of the avocado and feta.  Summer on a plate!

BLT Chopped Salad
via How Sweet It Is
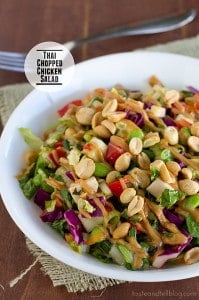
Another delicious salad is this Thai Chopped Chicken Salad.  I omitted the edamame, but even without it was very filling and hearty.  I missed where the peanut sauce was supposed to be different from the dressing, so I just piled them all together in a mason jar and shook away.  I can't say what they taste like apart, but it's mighty tasty all blended together.

Thai Chopped Chicken Salad
via Taste and Tell
If you want to channel your inner-90 year old granny, this recipe for Homemade Chicken 'n' Dumplings is the way to go.  Seriously people, this is where it's at.  I have been dreaming of this big bowl of goodness ever since I made it nearly a month ago.  I made it as a surprise for Wes since he often feels our meals are too healthy (is there such a thing?!).  We were both pleasantly surprised how authentically awesome these dumplings were.  Now don't get discouraged that these are from scratch.  As Jenna points out, from start to finish this entire dish takes about 30 minutes.  You couldn't even park and get waited on at Cracker Barrel in that amount of time.  Plus as a bonus, you know what's in it (or not in it).  

Homemade Chicken 'n' Dumplings
via Eat, Live, Run
For a few vegetarian and vegan options, the next 4 are incredible!  I honestly couldn't pick a favorite because they're all great in their own right.  The French Onion Burger from the Curvy Carrot is full of flavor and one of the "meatiest" veggie burgers I've ever made.  It holds together well and doesn't smoosh into 100 pieces when you take the first bite.  The boys didn't even know it wasn't a traditional burger.  I served them on a pretzel roll from Trader Joe's and I'm now in love with those buns!  I'm a sucker for anything with caramelized onions, so this one had my name written all over it.  I couldn't lift the picture from her site.  Smarty pants!   

Wes requested a Bahn Mi type sandwich one week and even added that it could be vegetarian.  Not one to ignore a good challenge, I set off to find the best recipe.  And boy did I?!  There are many components to this sandwich, just as there are for a traditional Bahn Mi, but each one is an integral part of the overall goodness of the sandwich.  The mushroom pate would be great on a burger.  The only modification I'd make in the future would be to halve or even third the pickled vegetables.  They do keep for up to a month, but I had difficulties finding other uses for them.  I did enjoy the Daikon, as this was the first time I think I'd ever had one.  Crusty bread is another must to help absorb some of the wetness from the pate and veggies.  We went the egg route, as opposed to the tofu.

Vegetarian Bahn Mi Sandwich
via The Chubby Vegetarian
Another vegetarian meal that I would bet you wouldn't miss the meat is this hearty Chickpea Crockpot Pie with Biscuit Topping.  If you haven't noticed by now, we like bread.  Really it's me and I've passed on my affection to everyone else since I'm the cook.  These biscuits, although vegan, are the bomb!  I think the moisture from the crockpot helps a lot, as does the creamy broth and veggies sticking to the underside of each bite of the biscuit.  It's a match made in heaven.  Everyone was asking for seconds and were fighting for the leftovers.

Chickpea Crockpot Pie with Biscuit Topping
via Peas and Thank You

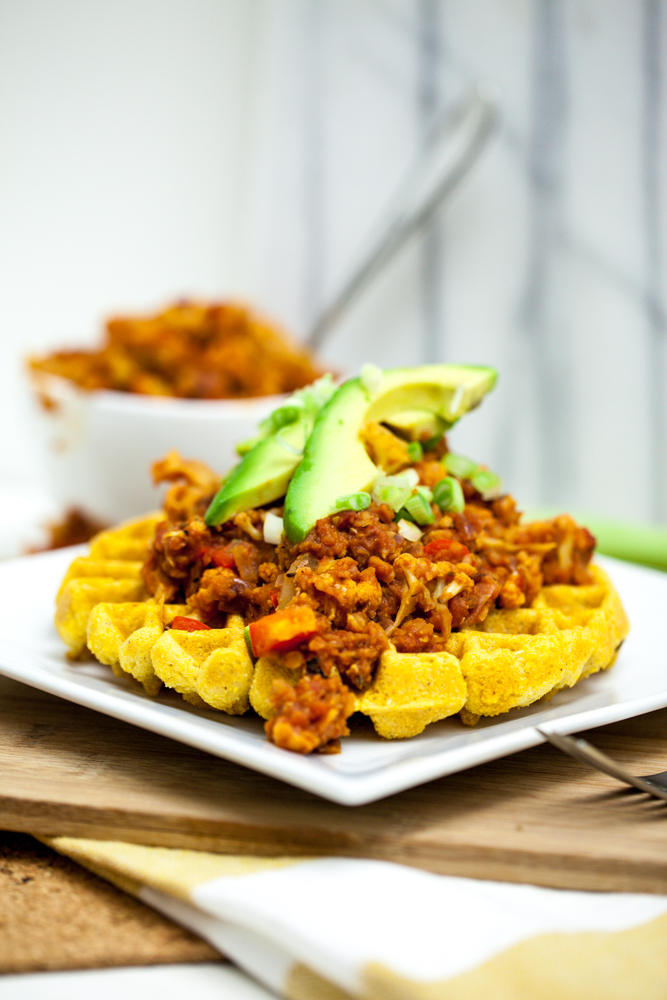
The last recipe may be a bit of a stretch for you.  Just trust me, it really it quite tasty.  Your kids will love that they get to eat a waffle and you'll love that said waffle is packed with nutrients.  Again, don't let the laundry list of ingredients overwhelm you.  Most of them are spices and all together it only takes about 30 minutes to prepare.  The cauliflower gets chopped up, so the mouths you are feeding are none the wiser that they're actually eating something healthy.  Honestly, I think I liked this one more than Wes, but he's funny on the texture of his food.  He needs some crunch in every meal and, well, this meal is lacking in that department.  He also doesn't like anything with the word "sloppy" in it because he said it automatically sounds unappealing.  I guess I see it.  The boys and I loved it though.

Cheesy Cornbread Waffles with Cauliflower Lentil Sloppy Joes
via Keepin' It Kind

Phew!  I'm hungry now.  Doing a big post like this makes me realize just how many meals have come out of my kitchen in the last 3 months.  Which one are you going to try first?  That is if you're not in a food coma by now!

 
Photobucket

Tuesday, February 5, 2013

Peanut Butter Chocolate Chip Cake

I certainly didn't want you to think there were no sweets coming out of my kitchen!  I may be able to cut out meat, but I've yet to be able to kick the sugar habit.  I do try to limit my consumption to one sweet thing a day, but I realize even that is too much.  Darn it for tasting so deliciously sweet to my tongue!

I had a craving for cake, so I consulted my counterpart for his suggestion.  Being the unselfish person he is, he told me to pick something for me.  Awe, how sweet.  Yes, but I wanted to make sure I wasn't the only one eating an entire cake.  So I found this compromise.  We both like peanut butter and I was able to change up the icing to be more peanut butter-like, instead of the chocolate ganache.  

Although the cake wasn't as light and fluffy as I traditionally like, this was a good cake.  The peanut butter was present, probably in large part to the icing, and the chocolate chips didn't seem to get in the way of the consistency or taste.  The only change I would make would be to add a little more liquid and cook it slightly less than the recipe indicated (both of these changes have been accounted for in my recipe below).


{Print this!}
Peanut Butter Chocolate Chip Cake with Peanut Butter Frosting
inspired by:  Culinary Concoctions by Peabody
For the cake:

4 T unsalted butter
1 cup all purpose flour
1/4 tsp baking soda
1/4 tsp baking powder
1/4 tsp salt
1/2 cup tightly packed brown sugar
3 ounces creamy peanut butter (or any flavor nut you choose)
1 large egg
1 egg yolk
1/4 cup sour cream
1/4 cup hot water
1/2 tsp pure vanilla extract
1/2 cup dark chocolate chips

Directions:

Preheat oven to 325F.

Grease 2 8-or 9-inch round pans. Line the bottoms with parchment if you wish. Set aside.

Combine flour, baking powder, baking soda, and salt.

Mix together brown sugar, peanut butter and butter for two minutes. Add egg and egg yolk and mix for another 2 minutes. Scrape down the sides and mix for another minute.

Add half of the flour mixture and mix until incorporated, about 20 seconds. Then add the sour cream, mixing again for 20 seconds. Gradually add the remaining flour mixture.  Add the hot water in a slow, steady stream and mix on low to combine, about 30 seconds. Add the vanilla and mix for another 10 seconds. Add the chocolate chips and use a rubber spatula to finish mixing the ingredients until thoroughly combined.

Divide the cake batter into the prepared pan, spreading it evenly. Bake for about 22 minutes.  Remove from oven and cool for 5 minutes or so before removing from pans.  Let cool completely before frosting.

For the frosting:

4 oz reduced fat cream cheese, softened to room temperature
1 cup (or more) powdered sugar
2-3 T. peanut butter
1-2 T. almond milk (or dairy milk)
2 T. cocoa powder

Directions:

Blend cream cheese and peanut butter with electric mixer until combined.  Gradually beat in powdered sugar and cocoa.  You may need to add a couple tablespoons of milk to make the frosting creamy.  Taste for desired sweetness and add more powdered sugar if needed.  


**Linking up to Jam Hands and Buns In My Oven.
Photobucket

Wednesday, December 5, 2012

Weekly Recipe: Cookie Dough Truffles

I made these little gems this summer for my mom's 70th birthday party, but I thought they were fitting for the holiday season as well.  The recipe yields quite a few and you can make them now, freeze them, and then give them as gifts whenever you want.  They've been a big hit every time I've served them, so I think they appeal to a wide audience of taste buds (even my non-chocolate taste buds!).


Cookie Dough Truffles
from:  What Megan's Making

8 T. butter, at room temperature
3/4 cup packed light brown sugar
2 1/4 cups flour
1 (14oz) can sweetened condensed milk (fat-free is fine)
1 tsp vanilla extract
1/2 cup mini semisweet chocolate chips
1 1/2 lb. semisweet (or bittersweet) chocolate, coarsely chopped
mini chocolate chips for garnishing

Cream the butter and sugar until light and fluffy, about 2 minutes.  Beat in the flour, condensed milk, and vanilla until incorporated and smooth.  Stir in the 1/2 cup chocolate chips.  Cover and refrigerate until the mixture is firm enough to form balls.  

Shape the chilled cookie dough mixture into 1-inch balls.  Place on wax-paper lined baking sheet and freeze 1-2 hours.

When ready to dip the truffles, melt the chopped chocolate in a double boiler.  Using a strong toothpick, dip each chilled truffle, one at a time, coating in chocolate and letting the excess drip off.  (If the cookie dough becomes too soft, return it to the freezer to chill for 30 minutes.)  Transfer the dipped truffles to a wax paper lined surface.  If using mini chocolate chips for garnishment, sprinkle on top quickly after dipping each truffle before the chocolate sets.

Store in refrigerator and serve cold.  These can also be frozen for longer storage.

Yields 4-5 dozen.
Photobucket

Thursday, October 18, 2012

Weekly Recipe: Carrot Cake Pie

Sometimes you feel like a piece of cake and sometimes you feel like a piece of pie.  But what do you do when you feel like both?!  Make Carrot Cake Pie, of course (:  I love the chewiness of the filling, juxtaposed with the crunch from the crust.  It makes me want to bake all my cakes in a pie shell!  
I totally forgot to add the confectioners' sugar to the frosting, but I honestly didn't miss it.  I decreased the original amount of sugar in the frosting in my recipe below because I honestly think the white chocolate sweetens it enough.  If you're like Colin, you eat the "white part" in one giant bite anyway!
Carrot Cake Pie
by: Crazy for Crust
Ingredients

For the Pie

  • 1 premade crust 
  • 1 cup flour
  • ½ teaspoon baking powder
  • 1/8 teaspoon baking soda
  • 1/4 teaspoon salt
  • 1 ½ teaspoons cinnamon
  • 1/8 teaspoon ginger
  • 1/4 cup melted butter
  • 1 cup brown sugar
  • 1 teaspoon vanilla
  • 1 egg
  • 1 cup shredded carrots
For the Frosting

  • ¼ cup white chocolate chips
  • 4 ounces cream cheese
  • 1 tablespoon butter
  • ½ teaspoon vanilla
  • 1/4 cup powdered sugar
Instructions
  1. Preheat oven to 350.
  2. Line a 9” pie plate with the premade crust, crimping the edges. Refrigerate until ready to fill.
  3. Combine flour, baking powder, baking soda, salt, cinnamon, and ginger in a medium bowl.
  4. Cream together butter and sugar with a mixer. Stir in eggs and vanilla until just combined.
  5. Stir dry ingredients into wet until just combined. Fold in carrots.
  6. Pour into prepared pie crust. Bake 25-30 minutes until the top is set and a toothpick comes out with only crumbs clinging to it. (If your crust starts to get too dark, cover it with strips of aluminum foil.) Let cool before frosting.
  7. To make the frosting: melt white chocolate chips in a small bowl in the microwave on 50% power in 30 second increments, stirring in between each, until melted. Let cool slightly. In a large bowl, beat cream cheese and 1 tablespoon butter with a mixer until creamy. Beat in melted white chocolate. Stir in vanilla. Add powdered sugar and beat slowly until combined. Use a 1M tip to frost around the edges and in the center, or just frost the entire top of the pie.
**Linking up to the What's Shakin' Link Party and the Simply Creations Link Party.
Photobucket

Tuesday, June 12, 2012

Vanilla Coconut Cream Cake (vegan)

Despite my best efforts, I cannot seem to cut sugar from my diet. Try as I might, the craving for something sweet never goes away for me. Perhaps I haven't given it long enough but they say you should listen to your body and when it's screaming dessert, I listen. I've always been the obedient type.  Top that with trying to cut out dairy and you've got a real situation and not the Pauly D kind.  

When a recent vegan coworker's birthday came up, I asked her what type of dessert she wanted.  She said anything but I knew she'd surely appreciate something vegan.  I was nervous, skeptical and also very anxious to try my hand at my first vegan cake.

I must have gotten lucky because I picked a great one!  I didn't even bother sharing with the rest of my coworkers that the cake was completely vegan because some of them wouldn't have even tried it.  After receiving positive remarks, I'm convinced you could fool anyone with this cake.  It is extremely moist and the coconut flavor is so prevalent, but in a good way.

There were several firsts for me in this cake - skimming the solid coconut from the top of a full-fat can of coconut milk, cooking with coconut milk yogurt, and using vegan, non-soy cream cheese.  My inner Alton Brown thought the coconut milk trick was super cool.  Who knew the fat solids rose to the top if left unshaken?  Further, who discovered that and who thought to use that as a frosting?  Brilliant!  As far as the coconut milk yogurt, I think I totally lucked out on that one because our local stores had just started carrying that product shortly before I selected this cake recipe.

I had to adapt the icing slightly for fear that it would just slide off the cake.  Thus, the vegan (non-soy based) cream cheese.  It was very creamy and less solid than dairy-based cream cheese.  I've yet to use the rest of it but I'm anxious to try it on a bagel or something where I can really taste it.

Other than the tiny addition in the icing, I stayed true to form with this recipe, following each instruction to the letter.  I've found it's best not to deviate when baking!  I encourage you to give this a try, you won't be disappointed (and if you are, you can mail me your leftovers!).


Double Layer Vanilla Coconut Cream Cake
source:  Mangia Gioia!

1 cup whole wheat pastry flour
1 1/4 cup all-purpose flour
1 tsp baking soda
1 1/4 tsp baking powder
1/4 tsp salt
1/4 cup virgin coconut oil (plus more for greasing pans)
1 cup evaporated cane sugar
1 (6oz) container coconut milk yogurt (I used raspberry to give it a little extra dimension)
1 1/4 cup unsweetened non-dairy milk (almond, rice, etc.)
1 T. vanilla extract

Sweet Coconut Whipped Cream
2 cans full fat coconut milk (see note)
3/4 cup powdered sugar
1 1/2 tsp vanilla extract
1/2 - 1 cup vegan (non-soy based) cream cheese
raw coconut for decoration

Note:  The coconut milk must be full fat (the low fat kind will not work).  Before making this recipe, allow the cans of coconut milk to sit in a cool place so that the solids can rise to the top.  This is what you need to make the whipped cream.

Directions:

1.  Preheat oven to 350.

2. Gently open the cans of coconut cream, being careful not to shake the contents. With a spoon, carefully scoop out the top layer of thick cream without disturbing the coconut water underneath. Make sure to not include any of the coconut water with the cream or the consistency will be too runny.

3. Transfer the cream to a medium bowl and add the powdered sugar and the vanilla extract.  Blend well with an electric mixer or whisk.  Gradually add cream cheese until you achieve your desired consistency.  The cream will be thick and slightly firm. Allow it to sit in the refrigerator to cool while you prepare the cake.


4. Sift the flour, baking soda, baking powder, and salt into a large bowl.

5. Using an electric mixer, beat the coconut oil and the sugar together in a separate bowl.

6. Add the yogurt, milk and vanilla extract to the coconut oil and sugar and beat until smooth.

7. Gently fold the wet ingredients into the dry ingredients careful not to over mix.

8.  Divide the cake batter evenly between two round 9-inch cake pans that have been lightly oiled and floured.  (I lined mine with parchment paper to be doubly sure.)

9. Place the cake pans on the middle rack in the oven and bake at 350F for 18-20 minutes or until a toothpick can be inserted and pulled out clean.

10. When the cakes are done, remove the pans from the oven and place on a cooling wrack to cool (about 15 minutes) then gently remove the cakes from the pans and set back on the cooling wrack to cool completely.

11. Once cakes are completely cool, take the chilled coconut cream out and whisk briefly to loosen the consistency. Spread desired amount of chilled cream over one cake round. Place the second cake on top. Proceed with frosting the cake with the rest of the cream. 


12.  Garnish with toasted or raw coconut. 


Photobucket

Thursday, April 19, 2012

A Belated Happy Birthday

I am overwhelmed by your response to my recent post on the journey of motherhood.  I am clearly not alone and thank each of you for your encouraging comments.  I read a post recently that really resonated with me.  She said that she learned more about herself in the first years of her kids lives than she has any other time in her life.  It's true, I have relied more on God these last few months than I ever have.  I have bent friends and family members ears so much, their ears are probably bleeding by now.  But I'm thankful to have them and I'm thankful for this journey, as hard as it might be!

Anyone recognize this handsome devil?


Yep, that's my darling husband.  And yes, he is sporting a National Championship shirt!  And yes, that is Colin holding his hand while we sang to him.  We celebrated his birthday earlier this month.  Colin wanted to know who he was going to invite.  Good question.  When do we quit having parties every year?  And why?  I'm not trying to take on another everything-has-to-be-perfect event but I'm a firm believer every birthday is a special one!  Wes didn't grow up with that same mentality but I'm out to try to change him, cake by cake, birthday by birthday (:


Our celebration may have only been the 4 of us, but it was no less special or decadent.  After all, what's a birthday without the cake?!  Wes, being the thoughtful person that he is, insisted that I not go to too much trouble for his cake.  Pa-leese!  This is the one time a year when you get to be spoiled and you shouldn't even consider such things.  Ok, maybe you should but I didn't want him to.

After sending him several drool-worthy cakes to look at, he finally said he wanted a version of this one, except chocolate.  I like having an inspiration but not having to follow it to the letter so I was definitely up for the challenge.  I used my old standard Hershey's Perfect Chocolate Cake recipe and then doctored up the Dulce de Leche filling and Chocolate Frosting.  What transpired was a moist cake with an icing that melted in your mouth with it's velvety texture.  The filling could have been a little more caramel-ish for me but it still had a delicious cream cheese taste.

I thought Sawyer might enjoy eating it with his hands, so I took off his shirt (see previous post about The Naked Brothers) but he was not interested in self-service.  I had to feed it to him but that didn't stop him from sticking his fingers in the icing crumbs on his plate and managing to lick the plate clean!  Believe it or not, cake is a real treat in our house!

What do you do to celebrate your loved ones birthdays?


Dulce de Leche Chocolate Layered Cake

Cake (Hershey's):


2 cups sugar
1-3/4 cups all-purpose flour
3/4 cup HERSHEY'S Cocoa
1-1/2 teaspoons baking powder
1-1/2 teaspoons baking soda
1 teaspoon salt
2 eggs
1 cup milk
1/2 cup vegetable oil
2 teaspoons vanilla extract
1 cup boiling water

Chocolate Frosting:

3/4 cup butter
1 1/2 cups powdered sugar
2 tsp vanilla
3 oz Valhona, or similar, milk chocolate
1 oz unsweetened chocolate

Dulce de Leche Frosting:

5 oz reduced fat cream cheese
4 T. butter, softened
1 1/4 cups powdered sugar
1/3 to 1/2 cup dulce de leche (I used Trader Joe's)
For the cake:

1. Heat oven to 350°F. Grease and flour three 9-inch round baking pans.

2. Stir together sugar, flour, cocoa, baking powder, baking soda and salt in large bowl. Add eggs, milk, oil and vanilla; beat on medium speed of mixer 2 minutes. Stir in boiling water (batter will be thin). Pour batter into prepared pans.

3. Bake 25 to 30 minutes or until wooden pick inserted in center comes out clean. Cool 10 minutes; remove from pans to wire racks. Cool completely before frosting.

For Chocolate Frosting:


1. Put both chocolates in a stainless steel bowl and place bowl over a pot of barely simmering water. Heat, stirring frequently, until the chocolate is completely melted. Remove the bowl from the pot and set the chocolate aside to cool.
2. In a medium mixing bowl, beat the butter on medium until creamy, about 30 seconds. Gradually add the powdered sugar and beat at high speed until light and creamy, about 2 minutes. Beat in the vanilla. Add the cooled chocolate at low speed, mixing until blended and scraping down the sides of the bowl as necessary. Increase the speed to high and beat until slightly aerated, about 1 minute.

Dulce de Leche Frosting:
In a medium mixing bowl, beat the cream cheese and butter together until creamy. Add the confectioners' sugar and mix until it has no lumps. Add the dulce de leche and mix until it is thoroughly combined.

To Assemble:
Place one cake layer on the cake stand and spread half of the dulce de leche frosting on it. Repeat with the second layer.  For a little extra decadence, drizzle extra dulce de leche over the frosting on each layer before topping with the next cake.

Frost the top and the sides with the chocolate frosting.  Store cake at room temperature.


Photobucket

Tuesday, March 13, 2012

Black and White Dulce de Leche Bars with Roasted White Chocolate & Iron Baker Challenge

Remember this post where I introduced you to the Iron Chef-like challenge?  Well the entries are in and the voting has begun!  There are 10 great entries but only one of them is MINE.  I'm asking for a simple favor.  I don't ask for much, I just need your vote.  You don't have to sign up, register, be a fan, or anything fancy, just leave a comment to vote for me.  I'd really appreciate it!  You can go here to view the entries and post your comment.

Here's what I entered:
Black and White Dulce de Leche Bars with Roasted White Chocolate


Is your mouth watering?  Why are you still here?!  Pop on over to 20 Going on 80 to get the recipe and cast your vote!  Please.  Pretty please with sugar on top!!  You have until midnight Sunday to vote.  Thank you for your support.


Black and White Dulce de Leche Bars
with Roasted White Chocolate

For the crust:
1/2 cup walnuts
1/2 cup old-fashioned oats
3/4 cup white-whole wheat flour (50/50 blend)
5 T. butter, cold

For the filling:
1 T. butter
1 can reduced-fat sweetened condensed milk
1 tsp vanilla
For the topping:
1/3 cup semi-sweet chocolate chips
6 oz good quality white chocolate
1 T. almond milk

To prepare the crust: Preheat oven to 375. In a food processor or Vitamix, process the walnuts and oats until they resemble coarse meal. In a mixing bowl, combine flour and processed nuts and oats. Cube the 5 T. butter and add to flour mixture. Using a pastry blender or your fingers, blend until the butter is the size of small peas. Press into the bottom of a greased 8- or 9-inch square baking dish. Bake for 10-15 minutes, or until edges just barely start to brown. Set aside. Reduce oven tempera­ture to 350.

To prepare filling: While the crust is baking, melt 1 T. butter in a small saucepan over medium heat. Add condensed milk and cook, stirring constantly, until it thickens, about 15 minutes. Remove from heat and stir in vanilla.

Pour the condensed milk mixture over the prepared crust. Bake for another 10-15 minutes or until golden brown.

For the topping: Melt 1/2 of the chocolate in the microwave with the tablespoon or almond milk or regular milk in 30 second intervals, stirring after each interval.

Remove the pan from the oven and quickly scatter the chocolate chips on top. Allow to sit for 1-2 minutes, then spread with a butter knife. Add the melted white chocolate by spoonfuls and swirl with the chocolate.

For an added punch, increase the oven temperature to 400 and place remaining white chocolate in a glass dish. Roast for 10-15 minutes, or until the top starts to turn brown. Remove from oven and let cool 10-15 minutes or until it’s cool enough to touch. Crumble the white chocolate over the top of the dish.

Refrigerate at least 2 hours before cutting.


Also linking up to Lady Behind the Curtain, A Little Nosh's Tastetastic Thursday, and It's a Keeper Thursday.

Monday, December 12, 2011

Weekly Recipe: Sweet Potato Cinnamon Rolls with Butterscotch Glaze

I couldn't get motivated to post much last week.  I was feeling a bit overwhelmed and decided to retreat into my shell.  I apologize for my absence but I want to make it up to you with these delicious cinnamon rolls!

If you remember back to Thanksgiving, I had a heavy hand with yeast, trying things never done before in my kitchen.  I had such great success, I've almost been scared to chance fate a second time.  Thankfully both the yeast rolls and these cinnamon rolls freeze well and I've been sampling here and there ever since!


I adapted the original recipe slightly, in that I subbed sweet potato for the pumpkin.  I had baked Sawyer a sweet potato thinking that would be easy on his gums while he was teething but he wanted no part of it, or most any food.  I certainly didn't want you to fear that I was out of pumpkin.  Tisk, tisk.  I have no fewer than 2 cans in my pantry right now (As a side note, don't stray from Libby!  I've tried both Whole Foods and Trader Joe's canned pumpkin and it pales in comparison to Libby.).

These cinnamon rolls come together fairly quickly once they've risen.  I would increase the amount of filling the next time but because of my Thanksgiving timing, I appreciated the calories that were spared!  The butterscotch glaze is delicious but also very sweet, which may be why she decreased the filling.  Either way, these are winners in my book.


Sweet Potato Cinnamon Rolls with Butterscotch Glaze
adapted from:  Sugar Plum

1/3 cup warm milk (not hot) (around 100-110 degrees F)
2 1/4 tsp active dry yeast
1/2 cup granulated sugar
1/2 cup sweet potato puree
2 T. oil (I used sunflower oil)
1 egg
2 tsp baking powder
1/2 tsp salt
3/4 tsp ground cinnamon
1/2 tsp ground ginger
1/2 tsp ground nutmeg
1/4 tsp allspice
3 1/2 cups 50/50 blend flour

2 T. unsalted butter, softened
1/3 cup brown sugar
1 1/4 tsp cinnamon

3 T. butterscotch chips
2 T. cream cheese
1 T. sweet potato puree
1 T. milk
2/3 cup powdered sugar
1/4 tsp vanilla extract

To make the dough, in a large mixing bowl whisk together 1/3 cup milk, yeast and granulated sugar until well combined. Allow to sit for 10 minutes until yeast is activated and bubbly. Whisk in sweet potato, oil, egg, baking powder, salt, 3/4 teaspoon cinnamon, ginger, nutmeg and allspice until well combined. Stir in flour until combined, and a dough ball forms. Lightly cover and allow to rise in a warm area for 1 hour and 30 minutes, or until doubled in bulk. (I used my oven. I preheated it on the lowest temperature, turned it off, then allowed my dough to rise in there.)

On a floured surface, roll out dough to a 1/4-inch thickness, into a rectangle. In a medium bowl, stir together butter, brown sugar and 1 1/4 teaspoons cinnamon until well combined; evenly spread on top of dough. Roll up dough, jelly-roll style. Slice into 10 equal pieces. Place in a greased 9-inch cake pan. Lightly cover and allow to rise in a warm area for 30 minutes.

Heat oven to 400 degrees F. Bake rolls for 15 minutes or until golden brown. Cool pan on a wire rack. To make the glaze, in a medium bowl, stir together butterscotch chips, cream cheese, 1 tablespoon sweet potato and 1 tablespoon milk until combined. Microwave for 30-60 seconds, stirring frequently until melted (It doesn't take long! Don't scorch your butterscotch!). Whisk in confectioners' sugar and vanilla until well combined and smooth. Drizzle glaze over cinnamon rolls.

Makes 10 cinnamon rolls


Thursday, November 17, 2011

Pumpkin Snack Cake with Cinnamon Cream Cheese Frosting

I have a new favorite combination - pumpkin and whole wheat flour.  Somehow the wholesome, nuttiness of the wheat is a perfect match for the sweet and creaminess of the pumpkin.  I just love pairing the 2 together whenever I get a chance.  Somehow it makes me feel slightly less guilty about eating sweets knowing that there are wholesome grains in it!

Thanks to this Pumpkin Snack Cake, I've also found that I prefer butter to oil when baking with pumpkin.  I realize most people would choose butter over oil, given the choice, but this cake really exemplified that for me.  It lends an extra richness to the cake that I just don't think oil provides.

With those 2 nuggets of information, I present to you one heck of a great cake!  I have made many iterations similar to this one but for whatever reason, this one ranks among the best.  It's the perfect sweetness, texture, and flavor.  Colin and I ate the entire pan of this, with the exception of 3 pieces that we gave away.  Delicious!

Pumpkin Snack Cake with Cinnamon Cream Cheese Frosting
adapted from First Look Then Cook (originally from Cooking Light)


Cake:
  • 10.1  ounces white/wheat blend flour (about 2 1/4 cups)
  • 2 1/2  teaspoons  baking powder
  • 2  teaspoons  ground cinnamon
  • 1 tsp nutmeg
  • 1/4  teaspoon  salt
  • 3/4 cup  packed brown sugar
  • 1/4 cup white sugar
  • 1/4  cup  butter, softened
  • 1  teaspoon  vanilla extract
  • 2  large eggs
  • 1  (15-ounce) can pumpkin puree (or butternut squash)
  • Cooking spray

Frosting:
  • 1/2 teaspoon  vanilla extract
  • 1/2 (8-ounce) package 1/3-less-fat cream cheese
  • 1  cups powdered sugar
  • 1/2 tsp cinnamon
Preparation
Preheat oven to 350°.
To prepare cake, weigh or lightly spoon flour into dry measuring cups; level with a knife. Combine flour, baking powder, cinnamon, nutmeg, and salt in a small bowl, stirring with a whisk.

Combine both sugars, 1/4 cup butter, and 1 teaspoon vanilla in a large bowl; beat with a mixer at medium speed until well combined. Add eggs, 1 at a time, to sugar mixture; beat well after each addition. Add pumpkin; mix well. Fold in flour mixture. Spread batter into a 13 x 9-inch baking pan coated with cooking spray. Bake at 350° for 25 minutes or until a wooden pick inserted into the center comes out clean. Cool completely in pan on a wire rack.

To prepare the frosting, beat cream cheese and vanilla with a mixer at medium speed until combined. Gradually add the powdered sugar and cinnamon, beating until well combined. Spread frosting evenly over top of cake.


Linking up to the Improv Challenge, hosted by Kristen at Frugal Antics of a Harried Housewife.  A big thanks to Kristen for taking over this group!  


;

Monday, November 14, 2011

Weekly Recipe: Pumpkin Snickerdoodles


Holy deliciousness, Batman!  These are some yummy cookies.  If you don't believe me, just look here, here, here, and here!  Same great cookie, same great taste.  With the slight alteration to incorporate some whole grains, I kept this one pretty much as written.  If these other fabulous cooks didn't see the need to make any changes, why should I?

Pumpkin Snickerdoodles
adapted from Annie's Eats, originally from dlyn  

Yield: about 3-4 dozen cookies

Ingredients:
For the cookies:
3¾ cups 50/50 white/wheat blended flour
1½ tsp. baking powder
½ tsp. salt
½ tsp. ground cinnamon
¼ tsp. ground nutmeg
1 cup (2 sticks) unsalted butter, at room temperature
1 cup granulated sugar
½ cup light brown sugar
¾ cup pumpkin puree
1 large egg
2 tsp. vanilla extract

For the coating:
1/3 cup granulated sugar
3/4 tsp. ground cinnamon
1/4 tsp. ground ginger
Dash of allspice


Directions:
In a medium bowl, combine the flour, baking powder, salt, cinnamon, and nutmeg.  Whisk to blend and set aside.  In the bowl of an electric mixer, beat together the butter and sugars on medium-high speed until light and fluffy, 2-3 minutes.  Blend in the pumpkin puree.  Beat in the egg and vanilla until incorporated.  With the mixer on low speed add in the dry ingredients and mix just until incorporated.  Cover and chill the dough for at least 1 hour (I made mine in batches over the course of 24 hours).

Preheat the oven to 350˚ F.  Line baking sheets with silicone baking mats or parchment paper.  Combine the sugar and spices for the coating in a bowl and mix to blend.  Scoop the dough (about 2½ tablespoons) and roll into a ball.  Coat the dough ball in the sugar-spice mixture and place on the prepared baking sheet.  Repeat with the remaining dough to fill the sheets, spacing the dough balls 2-3 inches apart.  Dip the bottom of a flat, heavy-bottomed drinking glass in water, then in the sugar-spice mixture, and use the bottom to flatten the dough balls slightly.  Recoat the bottom of the glass in the sugar-spice mixture as needed.

Bake the cookies for 10-12 minutes, or until just set and baked through.  Let cool on the baking sheets about 5 minutes, then transfer to a wire rack to cool completely.  Repeat with the remaining dough.  Store in an airtight container.  Mine kept soft for at least 5 days before I finally froze the rest.  They're just as good thawed too!


I'm joining in on the fun over at Mom's Crazy Cooking with her weekly challenges.  This week is your best PUMPKIN recipe.  Head on over and join in the fun.  The party is happening all week!

Friday, October 28, 2011

Friday Features from the Holiday Sweet Swap

Well my reign as Holiday Sweet Swap Hostess is drawing to a close.  Never fear, there will be 2 new great hostesses next month (A Creative Space and Crumbs and Chaos) and also in December that will provide you more drool-worthy recipes and features.  I wanted to go out on a high, sugar high that is, note and leave you with 5 mouth watering recipes to get you motivated to get in the kitchen this weekend and bake up something delicious. 

In no particular order, here's my list:


If you're feeling inspired or have baked something recently, we'd love for you to share your recipe with us at the Holiday Sweet Swap link party!  A big "thanks" to everyone who entered in the month of October!!  I hope you'll play again in November.  See you soon.

Tuesday, October 25, 2011

Holiday Sweet Swap: Pumpkin S'mores


I made a huge sacrifice agreeing to be a hostess for the Holiday Sweet Swap.  I mean make scrumptious desserts, look at other delicious desserts, and feature my favorite recipes?  Twist my arm!

Believe it or not, I am not a big fan of s'mores.  I'm not a huge chocolate fan and I'm also not a fan of marshmallows.  I know I'm strange but there are plenty of other sweets out there that I do love.  However, when I saw a recipe that combined s'mores (one of Wes' favorites) with pumpkin (one of my favorites), I thought this might just be a match made in heaven.

We did both enjoy it but I still ended up scraping my marshmallows off the top and picking out the chocolate chips.  Actually, I did half the pan with butterscotch chips and the other half with chocolate chips, in anticipation of me not liking them.  Turns out, I didn't really like the butterscotch chips either.  They were too sweet and I didn't like the contrast of texture.  Now the pumpkin filling is to. die. for.  Just give me a bowl of that and I'd be one happy girl.  I actually had a little leftover and ended up using that to make a pumpkin latte - yum!

Pumpkin S'mores
adapted from Taste and Tell


  • 1/2 cup of butter
  • 2 cups of pumpkin puree (I used a combination of pumpkin and sweet potatoes)
  • 1 can sweetened condensed milk
  • 1 teaspoon of cinnamon 
  • 1/2 teaspoon of nutmeg
  • 1 cup of Graham cracker crumbs
  • 45 graham crackers (approximately)
  • 9 cups of mini-marshmallows
  • 1/2 cup of semi-sweet chocolate chips
  • 1/2 cup of butterscotch chips

Preheat over to 450F  Line a 9x13 baking pan with waxed paper.

In a small saucepan on medium heat, combine the butter, pumpkin mix, milk, cinnamon and bring to a boil.  Remove saucepan from heat and stir in Graham cracker crumbs. Set aside.

Line 15 Graham crackers side by side ensuring that the entire pan is covered.  Pour 1/3 of the pumpkin mix onto the Graham crackers and spread evenly using a small offset spatula or the back of a spoon.  Top the pumpkin mix with approximately 3 cups of mini-marshmallows, ensuring it is as even as possible.
Sprinkle evenly 1/3 cup of the chocolate chips and/or butterscotch chips over the mini-marshmallows.

Repeat steps 5,6,7, 8 twice more. In all, there will be three layers of graham crackers, pumpkin mix, mini-marshmallows and chocolate/butterscotch chips.

Bake for 4 minutes at 450F and place gently on counter when taking it out of the oven.  Let it cool and set for 3-4 hours to firm up otherwise it will not cut well into squares (15).