Pages

Showing posts with label Vegetarian. Show all posts

Monday, August 19, 2013

Things You Must Try

During my hiatus, I haven't used my fancy camera one time.  Part of that is my frustration with not being able to quickly master it and part of it is just taking a much needed break.  As I tell my children, sometimes if you go away from something for a while, when you try again it's suddenly easier.  It's like clearing your brain, if you will.  I'm hoping that will happen with my photography skills.  I do know I don't practice often enough.  Again, something that I preach to my children almost daily.  Man this parenting thing sure does teach you a lot of what you're not doing as an individual!

Even though I don't have my own pictures, I've provided a link to the original photo to give proper credit.  Original pictures or not, I had to share some of our favorite recipes from the last couple of months.  There's a little something for everyone, I hope, so be inspired to try something new!

Let's start with dessert first, shall we?  I made this cake for my mom's birthday and it's one of my all-time favorites (and I've made a LOT of cakes!).  The only part I don't like is that you have to put the cake in the refrigerator to help set the whipped cream frosting in between the layers.  I just don't like the way the fridge dries out the crumb and makes it a little less moist, but even still the flavors of the cake make you forget about the texture of the cake.  She suggests Valencia oranges and after trying them, I second that suggestion. Navel oranges just don't have the powerful sweet orange taste like the Valencia ones.  She also talks about various butters and I used an Irish butter to give some extra richness to the cake.  Just don't use the cheap stuff and you should be good.  I didn't get a chance to do the fancy icing technique because I don't do artificial colors, but you should still watch her video of how she achieves such a beautiful pastel swirl.  It's almost too pretty to eat.  Almost.  
Orange Party Cake with Whipped Orange Frosting
via Sweetapolita

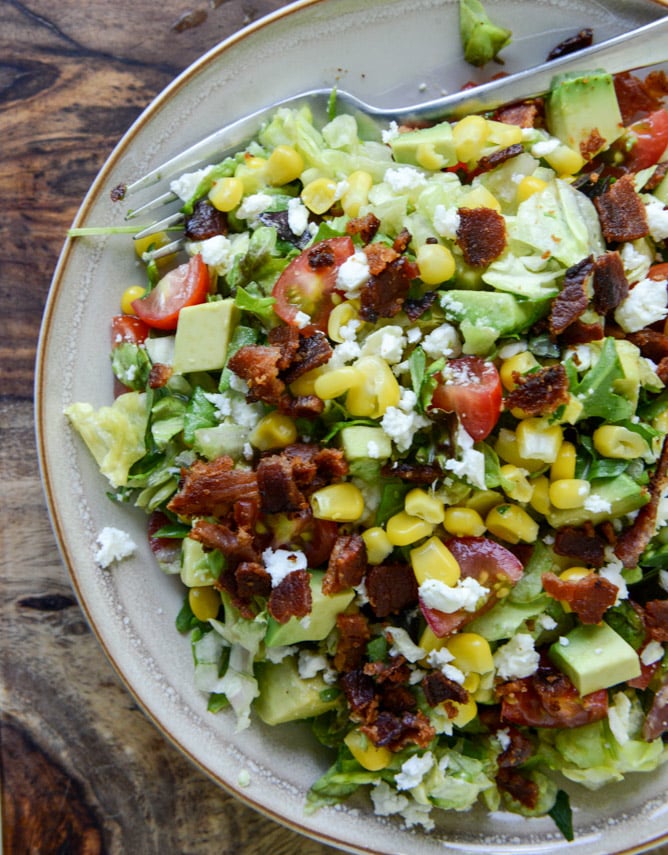
For a slightly healthier meal, might I suggest this BLT Chopped Salad with Corn, Feta & Avocado.  Seriously, it's everything I love all wrapped up in a giant bowl.  It's got both the crunch of the bacon and corn, as well as the creaminess of the avocado and feta.  Summer on a plate!

BLT Chopped Salad
via How Sweet It Is
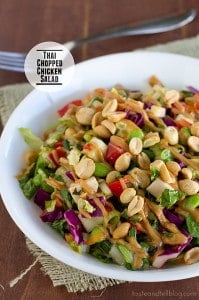
Another delicious salad is this Thai Chopped Chicken Salad.  I omitted the edamame, but even without it was very filling and hearty.  I missed where the peanut sauce was supposed to be different from the dressing, so I just piled them all together in a mason jar and shook away.  I can't say what they taste like apart, but it's mighty tasty all blended together.

Thai Chopped Chicken Salad
via Taste and Tell
If you want to channel your inner-90 year old granny, this recipe for Homemade Chicken 'n' Dumplings is the way to go.  Seriously people, this is where it's at.  I have been dreaming of this big bowl of goodness ever since I made it nearly a month ago.  I made it as a surprise for Wes since he often feels our meals are too healthy (is there such a thing?!).  We were both pleasantly surprised how authentically awesome these dumplings were.  Now don't get discouraged that these are from scratch.  As Jenna points out, from start to finish this entire dish takes about 30 minutes.  You couldn't even park and get waited on at Cracker Barrel in that amount of time.  Plus as a bonus, you know what's in it (or not in it).  

Homemade Chicken 'n' Dumplings
via Eat, Live, Run
For a few vegetarian and vegan options, the next 4 are incredible!  I honestly couldn't pick a favorite because they're all great in their own right.  The French Onion Burger from the Curvy Carrot is full of flavor and one of the "meatiest" veggie burgers I've ever made.  It holds together well and doesn't smoosh into 100 pieces when you take the first bite.  The boys didn't even know it wasn't a traditional burger.  I served them on a pretzel roll from Trader Joe's and I'm now in love with those buns!  I'm a sucker for anything with caramelized onions, so this one had my name written all over it.  I couldn't lift the picture from her site.  Smarty pants!   

Wes requested a Bahn Mi type sandwich one week and even added that it could be vegetarian.  Not one to ignore a good challenge, I set off to find the best recipe.  And boy did I?!  There are many components to this sandwich, just as there are for a traditional Bahn Mi, but each one is an integral part of the overall goodness of the sandwich.  The mushroom pate would be great on a burger.  The only modification I'd make in the future would be to halve or even third the pickled vegetables.  They do keep for up to a month, but I had difficulties finding other uses for them.  I did enjoy the Daikon, as this was the first time I think I'd ever had one.  Crusty bread is another must to help absorb some of the wetness from the pate and veggies.  We went the egg route, as opposed to the tofu.

Vegetarian Bahn Mi Sandwich
via The Chubby Vegetarian
Another vegetarian meal that I would bet you wouldn't miss the meat is this hearty Chickpea Crockpot Pie with Biscuit Topping.  If you haven't noticed by now, we like bread.  Really it's me and I've passed on my affection to everyone else since I'm the cook.  These biscuits, although vegan, are the bomb!  I think the moisture from the crockpot helps a lot, as does the creamy broth and veggies sticking to the underside of each bite of the biscuit.  It's a match made in heaven.  Everyone was asking for seconds and were fighting for the leftovers.

Chickpea Crockpot Pie with Biscuit Topping
via Peas and Thank You

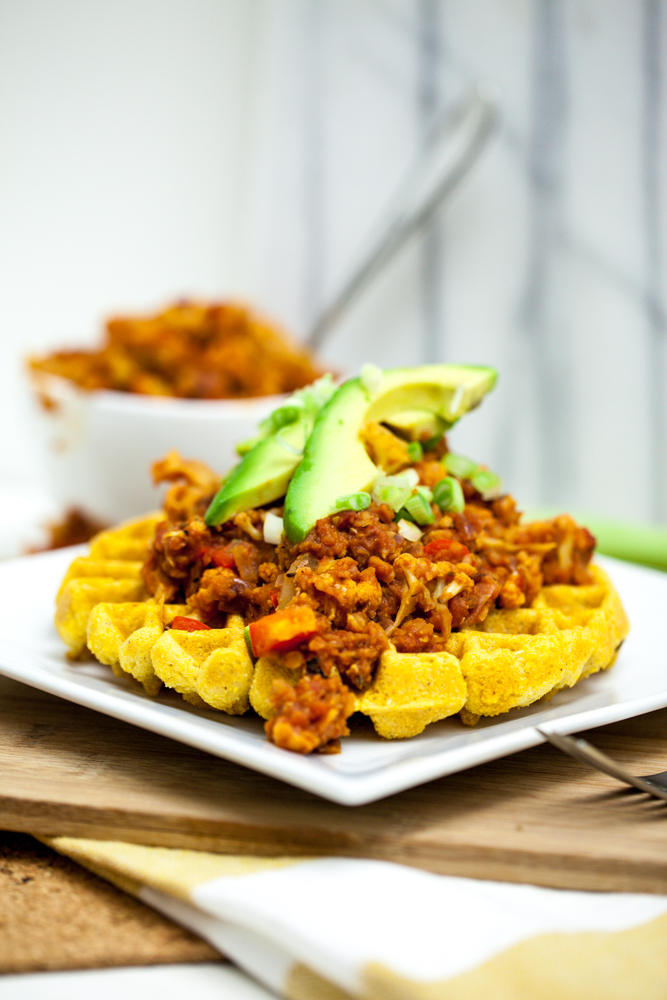
The last recipe may be a bit of a stretch for you.  Just trust me, it really it quite tasty.  Your kids will love that they get to eat a waffle and you'll love that said waffle is packed with nutrients.  Again, don't let the laundry list of ingredients overwhelm you.  Most of them are spices and all together it only takes about 30 minutes to prepare.  The cauliflower gets chopped up, so the mouths you are feeding are none the wiser that they're actually eating something healthy.  Honestly, I think I liked this one more than Wes, but he's funny on the texture of his food.  He needs some crunch in every meal and, well, this meal is lacking in that department.  He also doesn't like anything with the word "sloppy" in it because he said it automatically sounds unappealing.  I guess I see it.  The boys and I loved it though.

Cheesy Cornbread Waffles with Cauliflower Lentil Sloppy Joes
via Keepin' It Kind

Phew!  I'm hungry now.  Doing a big post like this makes me realize just how many meals have come out of my kitchen in the last 3 months.  Which one are you going to try first?  That is if you're not in a food coma by now!

 
Photobucket

Thursday, April 11, 2013

Roasted Vegetable Pockets


This is an adaptation of one of our family's favorite carnivore dishes, Chicken Crescent Squares.  Since we've started the vegetarian lifestyle, I find it increasingly more difficult to look at, much less touch raw meat.  So on few occasions we do have meat, I have to take a deep breath and try to think about something else as I cut it up.  I've never been the world's biggest meat-lover, so this isn't all completely new for me.  I don't expect most vegetarians experience this same phenomenon when they initially make the switch.

So I wanted to be able to still enjoy this recipe that we loved so much.  Once I decided to remove the chicken, the cream cheese didn't seem to fit anymore either.  I basically decided I'd just roast some veggies, throw in some roasted garlic and then spoon it into the crescent squares before baking.  

It turned out great and no one even missed the chicken.  Now it was a completely different dish than the old one, but just as tasty, if not better!

Roasted Vegetable Pockets
yields 4 pockets
{Print this!}
Ingredients:

1 small sweet potato, peeled and cut into 1/2-inch cubes
1 leek, white and light green parts only, washed and thinly sliced
4oz button mushrooms, quartered
2 cups cauliflower, chopped into bite-size pieces
1 small red pepper, cut into 1-inch pieces
1 tube of crescent rolls (I like Trader Joe's or Immaculate Baking Co.)
1 whole head garlic
1-2 T olive oil
1 tsp tumeric
salt & pepper
2 tsp balsamic vinegar

Directions:

Preheat oven to 425.  

Remove the outermost layers of skin from the head of garlic, being sure to keep the entire head in tact.  Cut off just enough of the end (top) where you can just barely see the garlic.  Tear off a small piece of aluminum foil (enough to wrap around the garlic) and place the head of garlic in the middle of the foil, drizzle with a teaspoon of olive oil, and gather the foil.  Roast in the oven for 45 minutes, or until it's squishy when you squeeze it.

Drizzle 1 T. olive oil on a large rimmed baking sheet.  Spread to coat with your hand.  Sprinkle salt and pepper generously on top of the oil.  Scatter the sweet potato cubes and cauliflower on top of the prepared pan.  Sprinkle with tumeric before baking for 15 minutes.  Remove from oven and add mushrooms, pepper, and leeks.  Toss with additional olive oil and spread veggies into a flat layer.  Bake another 10-15 minutes, or until veggies are soft.  Remove from baking sheet to a bowl and toss with balsamic vinegar.

Remove crescents from tube in one piece.  Divide along dotted lines to form 4 squares.  Seal the diagonal lines by pinching them together.  Flatten them out slightly with a rolling pin.  Spoon a heading tablespoon (or more) of the prepared veggies into the center of each square.  Bring each corner of the square to meet in the middle and pinch to seal each corner.

Bake, according to the crescent roll package directions, usually about 25 minutes, or until golden brown.

Photobucket

Thursday, March 14, 2013

Portabello Burger

Although you don't really need a recipe for a portabello burger, sometimes I appreciate the inspiration when I'm trying to think of something different, yet easy, for dinner.  

Mushrooms pack a hefty protein punch, as well as contributing to a wide range of essential amino acids.  Not to mention they're fat free and only have about 20 calories.  That allows for more flexibility and wiggle room with your toppings!

Portabello Burgers
serves 4
{print recipe}

For the mushrooms:
4 large portabello mushroom caps, rinsed and gills removed
1 T. extra virgin olive oil
3 T. balsamic vinegar
1 tsp dried basil

For the sandwiches:
1 large roasted bell pepper
1 medium beefsteak tomato
1-2 cups fresh torn spinach leaves
1/2 cup alfalfa/brocoflower sprouts
2 oz goat cheese, at room temperature
sun-dried tomato spread or grain mustard
4 whole wheat buns

Directions:
Clean and dry portabello caps and spoon out the gills from the underside.  Place caps in a large resealable bag and add olive oil, balsamic vinegar, and dried basil.  Marinate for 20-30 minutes.

Prepare grill pan over medium-high heat.  Remove caps from bag, discarding marinade.  Grill 3-4 minutes on each side, or until mushrooms have shrunk in size and become soft.

Assemble the sandwiches by spreading goat cheese on one side of each sandwich.  Spread sun-dried tomato spread or grain mustard on opposite side of bun.  Place the spinach leaves on top of the goat cheese to give them something to stick to (sounds silly but I hate when things fall off my bun!).  Top with tomato, roasted pepper, sprouts, and finally portabello caps.  


Photobucket

Tuesday, March 5, 2013

Vegan Lasagna Bolognese

Sometimes seeing a laundry list of ingredients dissuades me from trying a recipe.  However, when you actually read the list, chances are you'll have quite a few of the ingredients on the list.  Just think of it as "the more the merrier" and maybe you'll open up a whole new world of possibilities.  When half of the list is veggies, just think of all the nutrients you're packing into that one dish!  
This one may seem long and involved, but it comes together fairly quickly and I love getting to sneak as many veggies as I want in the sauce since it's all getting pureed in the end.  I didn't even miss the cheese, but then again I went into it knowing it wasn't going to be a typical lasagna.  
My only note is to be generous with your sauces.  After all, that's what will be cooking your noodles and keeping your lasagna from becoming dry.
Vegan Lasagna Bolognese
adapted from Vegan Richa
{Print recipe}

Quick Bolognese sauce:

1 tsp extra virgin olive oil
1/3 cup onion, chopped
2 bay leaves
1/2 of a large red pepper, chopped
¼ tsp chili flakes, more if you like it spicy
2 medium-sized tomatoes, chopped
1 stalk celery, chopped
1 carrot, chopped
4 cloves garlic
1 tsp vinegar
2-3 T. red wine, optional
2 tsp dried basil
1 tsp oregano
½ tsp salt
¼ tsp pepper
1/4 cup water
½ package of tempeh (or chopped mushrooms)

No-boil lasagna noodles (for later use)
¼ cup whole wheat bread crumbs (for crumb topping)
½ tsp basil (for crumb topping)

In a large pan, add a teaspoon of extra virgin olive oil and heat on medium.  Add chopped onion and 2 bay leaves and sauté until transparent, about 4-5 minutes.  Add red pepper, celery, carrots, and red pepper flakes and cook for another 5-7 minutes, or until the peppers and celery begin to soften.  Add the tomatoes, garlic cloves, wine (if using) and vinegar and cook just a minute more.  Remove from stove and transfer to a blender.  Puree until smooth, adding water ¼ cup at a time, as needed.

While you’re pureeing the sauce, crumble ½ package of tempeh into the original skillet and let it begin to brown, about 4-5 minutes.  Once it has a little color, return the sauce to the pan with the tempeh and cook for 7-8 minutes until slightly thick.  (The water content from the sauce will get absorbed in the noodles during baking.)

Taste and adjust salt and herbs.

Quick White Garlic sauce:

¼ cup raw cashews
2 T. flour of your choice (wheat, white, spelt)
1 tsp garlic powder
1 tsp mustard powder
1 tsp onion powder (or flakes)
2 T. nutritional yeast
¼ tsp pepper
1 cup non-dairy milk
½ tsp salt
¼ tsp sugar or maple syrup
1 T. extra virgin olive oil

In a blender, pulse the ¼ cup raw cashews until they are mostly ground.  Then add remaining ingredients up to the olive oil.  Blend until smooth.  Taste and adjust if needed.  For a creamier sauce, add the olive oil and blend again.

To assemble the Lasagna: 

Spread a thin layer of the Bolognese sauce on the bottom of a 7x11 pan.  Top with a layer of no boil lasagna noodles, followed by a layer of the white sauce (the sauce will be thin, but will thicken during baking.)  Repeat layers until both of the sauces are gone, ending with the white sauce.
Top with bread crumbs and ½ tsp basil and some shredded Mozzarella or vegan Parmesan.  Cover the baking dish tightly with foil.  Bake in a preheated 375 degree oven for 40 minutes. 
Remove lasagna from oven, remove the foil, and let it rest 10 minutes before serving.

**Linking up with Buns In My Oven, Taste & Tell Thursday, and Whole Foods Wednesday.

Photobucket

Monday, February 25, 2013

Nacho Potatoes

I could seriously eat 12 plates of these.  There's nothing particularly challenging or fancy about it, sometimes you just crave some comfort food.  What's not comforting about potatoes?  Mexican potatoes at that!  This dish is highly adaptable and can either be served as a main dish with maybe a bowl of soup, or as a side to nearly any meal.  As long as you don't use spicy chili powder (like I did!), it's sure to be a crowd pleaser, even for the little ones at your table.


Nacho Potatoes
from Keepin' It Kind

{Printable recipe!}

For the potatoes:
 3-4 heaping cups Yukon potatoes, sliced into 1/4-1/2-inch slices
 olive oil spray
 1/2 teaspoon cumin
 1/4 teaspoon smoked paprika
 salt and pepper to taste

 For the bean mixture:
 1 tablespoon vegetable broth
 1 tablespoon Bragg Liquid Aminos
 1 15oz. can black beans, rinsed and drained
 1 cup corn kernels (I used frozen and thawed)
 1/2 red bell pepper, chopped
 2 cloves garlic, minced
 1 teaspoon liquid smoke
 1 teaspoon cumin
 1/2 teaspoon smoked paprika
 1/2 teaspoon ancho chili powder
 juice of 1/2 a lime
 2 tablespoons fresh cilantro, roughly chopped (optional)
 salt and pepper to taste

 For the Nachos:
 1 cup shredded cheddar (vegan or not)
 1 tomato, chopped
 guacamole (use your recipe of choice, or store-bought)

Preheat the oven to 450. Line a baking sheet with parchment paper. Spread out your potato chunks and lightly spray with olive oil (or drizzle about 1      teaspoon of oil over them). Add spices and salt and pepper to taste. Toss to fully coat each piece. Roast in the oven for 20 minutes, flipping once.

While your potatoes are in the oven, cook your beans. In a large pan, combine the vegetable broth, Bragg Liquid Aminos, and garlic. Heat the pan over medium heat and add your black beans. Cook the beans in the liquid until the liquid begins to simmer, about two minutes, before adding the corn, the bell pepper, the chilies, the liquid smoke, and the spices. Turn the heat to low and cook the beans, stirring occasionally, until the liquid has cooked away. Squeeze in the lime juice, stir in the cilantro and add salt and pepper to taste. Remove from heat.

To assemble the nachos, portion out the potatoes on 4-6 plates.  Top the potatoes with equal portions of the black bean mixture, followed by the cheese, guacamole, and finally, the tomatoes.  Serve immediately.


Linking up to:


Photobucket

Sunday, February 17, 2013

Creamy Cauliflower & Leek Soup


I'm trying to get in as many soups as I can while it's still cold outside.  Once the warm air strikes, soup is usually the last thing that pops into my head as I make the menu.

Lately, I feel like I've gone back to making baby food with all the pureeing, but it really is a great way to get in a few extra veggies.  Read:  I'm tired of having to pick out every tiny onion from Colin's food so that he'll eat it!  This solves the problem.  If he eats it.

I love the whole roasted garlic glove in this soup.  It tones down the stay-with-you-all-day raw garlic and transforms it into almost a nutty taste.  I'm also a big fan of leeks because I love cutting them and seeing all the layers fall apart.  I know, I'm a nerd.

The original recipe called for a turkey bacon crumble on the top, but to make this vegetarian, I omitted that and changed the chicken broth to veggie broth - 2 easy substitutions.

We all really enjoyed this and it's easy enough to make up in the morning, or even the night before.  Just reheat when you're ready to serve.

Creamy Roasted Garlic & Cauliflower Soup          {Print it!}
originally posted on Good Life Eats

Ingredients:

1 whole head cauliflower
1 large whole head garlic
1/2 tablespoon olive oil
1 tablespoon butter
1 1/2 stalks celery, diced
1 yellow onion, diced
1 carrot, diced
1/2 teaspoon salt
1/4 teaspoon pepper
1/8 teaspoon paprika
1/4 teaspoon dried thyme leaves
1 tablespoon flour
1/3 cup dry white wine
1/2 cup water
2 cups chicken or vegetable broth, plus up to 2 more as needed for desired consistency
1 dried bay leaf
2 teaspoons fresh minced parsley
1/3 cup almond milk
additional oil for serving - olive oil or truffle oil

Directions:

Preheat oven to 400 degrees F.

Cut cauliflower into individual florets. Toss with 1 tablespoon olive oil. Transfer to a foil lined baking sheet. Sprinkle lightly with salt and pepper.

Cut the top off of the head of garlic. Drizzle with olive oil and wrap with foil. Place wrapped garlic on the baking sheet. Roast the cauliflower and garlic at 400 degrees F for 15-20 minutes. When the cauliflower is tender and golden remove from the oven.

The garlic will need to roast for a total of about 25-30 minutes. You can remove it to check it's progress as needed - it should smell fragrant but not raw, be golden and tender.

Meanwhile, heat the butter in a cast iron dutch oven or medium-large stock pot. Add the onion, celery, and carrot. Saute over medium heat for about 10 minutes. Whisk in the salt, pepper, paprika, thyme, and flour and continue to cook for 2 more minutes.

Add the wine and water, whisking to combine with the flour mixture. Then, slowly add in the 2 cups broth. Add the bay leave and roasted garlic cloves. Bring mixture to a boil, then reduce heat to medium-low and simmer for 10 minutes. Add the cauliflower and simmer an additional 5 minutes.

Remove the bay leaf. Working in batches, add the soup to a blender or food processor and blend until pureed and smooth. Add additional broth during or after blending to achieve desired consistency. After all the batches have been completed, return to the pot. Stir in the almond milk and parsley. Cook until just heated through. Adjust salt and pepper for tastes.

Serve immediately, topped with a drizzle of olive or truffle oil.


Photobucket

Monday, January 28, 2013

Healthy Fettuccine Alfredo with Broccoli

Some classics are better left alone.  Some can be tweaked and still be good.  And some can be completely transformed completely and turn out just as good, if not better than the original.  
I am a big fan of fettuccine alfredo but I'm not a fan of the solid rock that forms in my stomach approximately 30 minutes after eating it.  When it hits, it hits hard and then I have a nagging reminder just how many calories I just consumed.  But I love the taste and I love the change of pace from a traditional red sauce.  
Let me introduce you to my new favorite compromise, a healthier version using cauliflower.  If you're skeptical, it's okay, I was too.  I have no doubt Wes was nervous and counting the hours until this meal was behind us.  Thankfully, we were both wrong.  This was light, creamy, and no detectable cauliflower taste.  The boys lapped it up without blinking and were none the wiser to the added veggies.  I even brought some in for some coworkers, whom I could tell were skeptical when I described it.  They both enjoyed it as well.  I think this one is a keeper.  I encourage you to give it a try and see if you can fool your dinner companions as well.  


Healthy Fettuccine Alfredo                                        {Print it!}
inspired by Pinch of Yum

What you'll need:

1 lb fettuccine noodles (preferably whole grain, brown rice, or quinoa)
1 large head cauliflower
6 cups vegetable broth
6 cloves garlic, minced
1 T. butter
1 tsp salt
1/2 tsp pepper
pinch nutmeg
1 T. olive oil
1/4 cup heavy cream
1 cup pasta water reserved from cooking noodles
1 lb broccoli

Directions:

Coarsely chop cauliflower into small chunks.  Bring the broth to a boil over medium heat and add cauliflower.  Cook until cauliflower is soft, about 15 minutes.  (The longer you cook it, the smoother your sauce will be.)  

Meanwhile, melt the butter in a large saute pan over medium heat.  Add the minced garlic and saute 4-5 minutes, or until soft and fragrant.

As the garlic and cauliflower are cooking, bring a large pot of water to a boil and cook the fettuccine according to package directions, being sure to reserve a cupful for later.  

Bring another pot of water to a boil and steam broccoli for 4-5 minutes until crisp tender.

Transfer cauliflower and about 2 cups of liquid to a blender (a Vita-Mix is helpful for a super smooth consistency).  You may need to do this in batches, depending on the size of your blender.  Add the sauteed garlic, salt, nutmeg, and pepper and puree until very smooth.  Once the mixture is moving, stream a little olive oil into the blender.  Add more broth or water if the mixture is too thick to move through the blender.  When puree is very smooth, transfer back to the garlic saute pan.

Add the cream and cook over low heat.  Add the pasta water (I didn't need nearly a full cup) and keep warm until ready to serve.  Add noodles to pan if pan is large enough, or transfer to a large pot or pan to combine.  Top with steamed broccoli before serving.

Serves 6


**Linking up to Jam Hands Recipe Sharing Monday, Show Me Your Plaid Mondays, Whole Food Wednesdays, and Fine Craft Guild.  
Photobucket

Monday, January 21, 2013

Weekly Recipe: Wild Style Rice Salad


If you're following along with my weekly menu plan, this salad goes with the Garlicky Avocado Shrimp Sandwiches.  I wasn't able to link to a recipe, so I wanted to share it with you.  

It's a very interchangeable salad, where you can add and subtract nearly any of the ingredients and it will still turn out great.  For added nutrition, I do advise you to stick to the wild rice, as opposed to brown or white rice, but if you're opposed brown rice would also work.  (As a kid, I used to pick out every one of the black rice kernels!)


Wild Style Rice Salad

2 bell peppers (colors of your choice), seeded and diced
1 stalk of celery, chopped
2 green onions, diced
1/2 cup raisins
1/2 cup dry roasted, unsalted peanuts
1 cup uncooked wild rice

For the vinaigrette:
2 T. apple cider vinegar
1 tsp dijon mustard
1 tsp agave syrup (or honey)
1 tsp dried badsil
1 garlic glove, minced
1/2 tsp salt
1/4 tsp pepper
1/4 cup EVOO

Soak wild rice overnight, or at least 8 hours.  Drain.  Combine rice with 3 cups water in a medium saucepan.  Boil, then cover and reduce heat to low, cooking for 30 minutes.  Remove lid and drain the rice.  Allow to cool as you prep the remaining ingredients and dressing.

For the vinaigrette, combine all but EVOO in a jar.  Shake vigorously to combine.  Add EVOO and shake again.

Combine rice and the remaining salad ingredients in a large bowl.  Toss with vinaigrette.

Refrigerate for at least 30 minutes to allow flavors to meld.  You can make this a day ahead.

Serves 8-10.


Photobucket

Thursday, January 17, 2013

Weekly Recipe: Naan with Goat Cheese, Sauteed Chard, and Crispy Shallots

Remember when I actually used to post recipes?  Yeah, it's been a while.  You're probably starving and it's all my fault.  Please forgive me.  I have a great appetizer/side dish/bread in one to make it up to you. This is a great way to add some greens to your meal without having to have yet another salad.  Don't get me wrong, I love salads, but I also love variety!

This bread was inspired by a recipe in "Fast & Fresh Vegetarian" and I only slightly adapted it.


Naan with Goat Cheese, Sauteed Chard, and Crispy Shallots

3-4 pieces of naan bread, depending on size (Trader Joe's has my very favorite!)
1 bunch chard (any kind of chard or kale would work), washed and chopped into 1-inch pieces
1 large shallot, sliced thinly
2 T, plus 1 tsp olive oil
1 large garlic clove, minced
2-3 oz goat cheese, at room temperature
1/4 cup sun-dried tomato spread (mine was from a specialty store but you could substitute a pesto)
salt and pepper

Preheat oven to 350.

Heat 2 T. olive oil in a small skillet over medium-high heat.  Once the oil is hot, add the shallots.  Cook, stirring occasionally for 5-7 minutes, or until they begin to brown.  Remove to a paper towel lined plate.

While the shallots are cooking, heat 1 tsp olive oil in a large skillet.  Add the garlic and saute just until fragrant, about 30 seconds.  Add the chard and turn until it is incorporated with the garlic.  Place a lid over the pan and turn the heat to low.  Allow the greens to wilt completely.

Place naan on a baking sheet.  Heat in preheated oven for 5 minutes, or until warm.  Remove from oven and spread each piece with equal amounts of goat cheese.  Note: Doing this while the naan is still warm makes the spreading go a lot easier.  Spread about 1 T. of sun-dried tomato spread on each piece, on top of the goat cheese.  Divide the wilted chard amongst the naan and top with the crispy shallots.  



**Linking up to the What's Shakin' Link party.
Photobucket

Monday, December 17, 2012

Weekly Recipe: Green Bean Casserole

There are a few items I miss after cutting out processed foods (at least most of them).  Sometimes it's not so much the item, it's what you use the item to make.  I've always been a fan of green bean casserole, but Wes is not, so I haven't been tempted to make it very often.  Add to that the processed soups and it's just something I've had to wipe out of my cooking repertoire.  That is until I finally got around to making this Lightened Up Green Bean Casserole on How Sweet It Is.  
Holy cow!  It's every bit as delicious as I remember and even better because of the fresh ingredients.  I really appreciate the freshness of the green beans and mushrooms to really provide a good solid base for the dish.  One thing I recall about the Campbell's version was the mushiness of it.  It basically all just globbed together, but not so with this one.  I'd highly recommend adding this to your holiday table, or just a weeknight meal like we did.  I don't think you'll be disappointed.  
Lighted Up Green Bean Casserole
                                        
Click here for a printable recipe!
1 lb fresh cut green beans or haricot vert
2 tsp olive oil
1/2 onion, thinly sliced
1/2 tsp salt
1/2 tsp salt
1 T. butter
8oz cremini mushrooms, sliced
2 garlic cloves, minced
1 T flour
1/2-3/4 cup no-chicken chicken broth (Imagine brand)
1/2 cup low-fat half-and-half
pinch nutmeg
2 T. freshly grated Parmesan cheese
1/4 cup panko crumbs
Preheat oven to 400.
Heat a large, oven-safe skillet over low heat and add olive oil, onions, and a pinch of salt.  Stir well to coat, then cover and cook until onions are caramely, about 20 minutes, stirring occasionally - you may need to turn up your heat a bit if the onions are starting to change color.  While onions are caramelized, boil a large pot of water.  Once boiling, add green beans and cook 4-5 minutes, then drain and run cold water over top, letting sit in the sink to air dry until you're ready to use.
Once onions are caramelized, remove to a bowl for later use.  Add butter to skillet, then add chopped mushrooms and toss well to coat.  Cook for 6-8 minutes, until juicy and soft, then add in half of the onions and the garlic and cook 30 seconds.  Increase heat to medium-high and sprinkle flour over top.  Stir well to coat and distribute, cooking for 2-3 minutes.  Pour in broth and half-and-half.  Stirring constantly, let mixture come to a bubble, then let it cook 2-3 minutes until just slightly thickened.  You don't want it too thick since it will continue to cook and thicken in the oven.  Season with remaining salt, pepper, and nutmeg, and then stir in 1 T. Parmesan cheese.  Add green beans and toss well to coat.
Cover the top with remaining onions, panko, and remaining tablespoon of cheese.  Bake, uncovered, about 25 minutes, or until bubbly and bread crumbs are toasted.  
Serves 4-6
Halved fromHow Sweet It Is (adapted from Alton Brown)
Photobucket

Thursday, October 25, 2012

Weekly Recipe: Caramelized Cabbage and Onion Pasta with Bread Crumbs

Now don't go getting your panties all in a wad because I said cabbage.  If you give this a chance, I really think you'll like it.  Wes was just as skeptical as some of you and I assure you, he cleaned his plate.  Sometimes preparing common foods in somewhat unconventional ways produces something great!  I believe that was the case with pairing cooked cabbage with pasta.  The sometimes pungent flavor (and smell) of the cooked cabbage was scaled down by the garlic and onion.  The pasta helped to further dilute the intensity, providing a very balanced medley of flavors.  I love the toasted bread crumbs on top for a little unexpected flavor crystal in each bite.  


Caramelized Cabbage and Onion Pasta with Bread Crumbs
adapted by: Prevention RD

5 cloves garlic, minced
2 Tbsp unsalted butter
3 slices wheat bread, torn into pieces
2 Tbsp fresh sage
1/4 tsp black pepper, plus more to taste
1 lb whole wheat pasta, cooked al dente
1/4 cup reserved pasta water
1/3 cup extra virgin olive oil
1/2 to 1 tsp crushed red pepper flakes
1 small  head cabbage, roughly chopped (about 4 cups)
1 large yellow onion, sliced thin
2 oz (1/2 cup) freshly grated Parmesan cheese
1/2 cup walnuts, chopped

Directions:
In a food processor, combine half the garlic, sage, and bread; pulse  until you have fine bread crumbs.
Melt butter in a skillet and add the bread crumbs. Stir and toast for about 2 to 3 minutes. Turn off the heat and set aside.

In a large skillet, turn on the heat to medium-high and add the olive oil, crushed red pepper flakes, and the remaining garlic. When the oil is hot, add the sliced onion and cabbage, along with a pinch of salt. Stir the cabbage and onions until they begin to reduce and caramelize, about 15 minutes.

Add a 1/4 cup of the pasta cooking water to deglaze the pan. Scrape the bottom of the pan with the water.
Toss your cabbage/onion mixture in with the pasta and bread crumbs. Serve with freshly grated Parmesan cheese. Top with toasted walnuts.

Yield: 8 servings (1 1/2 cups each)

**Linking up to Tastetastic Thursday.
Photobucket

Monday, September 17, 2012

Weekly Recipe: Three Bean Salad with Corn and Avocado


Oh summer how I'll miss thee.  With your sweltering 90+ degree weather, 100% humidity, and grass burning, crop stopping hot sun rays, I'm not too sad to see you go.  I will miss the bright colored florals, the leaves actually on the trees, as opposed to bare limbs, and most importantly, the summer vegetable bounty.  I'll gladly sacrifice those things for that crisp autumn air, beautiful fall foliage, and I'll even replace those delicious summer vegetables with squashes and gourds.  Summer, it's been nice, but it's time to move over for fall.  

Here's somewhat of a transitional side dish that will carry you over into fall.  Most of these veggies are available nearly year-round...at least at a price!

Three Bean Salad with Corn and Avocado
source:  Cooking Light

  • 1 cup halved heirloom grape or cherry tomatoes
  • 1 teaspoon salt, divided
  • 3 ears shucked corn $
  • 1 medium white onion, cut into 1/4-inch-thick slices
  • 1 jalapeño pepper
  • 1 tablespoon olive oil
  • Cooking spray
  • 1/3 cup chopped fresh cilantro
  • 1/3 cup fresh lime juice
  • 1 (15-ounce) can no-salt-added pinto beans, rinsed and drained $
  • 1 (15-ounce) can no-salt-added black beans, rinsed and drained
  • 1 (15-ounce) can no-salt-added kidney beans, rinsed and drained $
  • 2 diced peeled avocados
Preparation
  1. 1. Preheat the grill to medium-high heat.
  2. 2. Place the tomatoes in a large bowl, and sprinkle with 1/2 teaspoon salt. Let stand 10 minutes.
  3. 3. Brush corn, onion, and jalapeño evenly with oil. Place vegetables on grill rack coated with cooking spray. Grill corn for 12 minutes or until lightly charred, turning after 6 minutes. Grill onion slices and jalapeño 8 minutes or until lightly charred, turning after 4 minutes. Let vegetables stand 5 minutes. Cut kernels from cobs. Coarsely chop onion. Finely chop jalapeño; discard stem. Add corn, onion, and jalapeño to tomato mixture; toss well. Add remaining 1/2 teaspoon salt, cilantro, and next 4 ingredients (through kidney beans) to corn mixture; toss well. Top with avocado.


Linking up to What's Shakin' Link Party.
Photobucket