Pages

Showing posts with label Side Dishes. Show all posts

Monday, May 6, 2013

Cowboy Coleslaw


Kids can be so unpredictable.  One meal they love everything on their plate, the next meal they're picking out pieces of who knows what and whining all the while.  Even though my kids are both good eaters, I assure you we are not exempt from this behavior.  My personal favorite is when you serve the same dish a second time and this time they suddenly don't like it and declare it "gross."  How could your tastebuds change in the matter of a few months?  Blasphemy!  

This coleslaw turned out to be one of those dishes.  That is until the oldest realized there were apples, grapes, and pickles, and that he did, in fact, love all of those things.  So just as quickly as he curled  up his nose, he was begging for more.  My day just wouldn't be complete without some unnecessary whining and protest.

Like the wee ones, the big ones enjoyed this coleslaw as well.  I love a good coleslaw alongside a burger or sandwich, but I'm not a fan of the boring, run-of-the-mill-mayo-laden varieties.  This one offers a little extra crunch with the fruits and a little tart with the pickle.  I don't really think a "cowboy" would make this, but I'm sure one would enjoy it if they tried!    


Cowboy Coleslaw

Ingredients:

1/3 cup Veganaise (or regular mayo)
2 T apple cider vinegar
2 T sugar
2 tsp grain mustard
1/2 tsp salt
1/2 tsp pepper
1 tsp onion powder
1 bag shredded cabbage or slaw mix
6 dill pickle slices (the big "Stackers" kind)
1/2 cup red grapes, cut in half

Directions:

In a large bowl, combine shredded cabbage, pickles, and grapes.  Toss to combine.

In a small bowl, whisk together remaining ingredients until smooth.  Pour over cabbage mixture and toss well to coat.  Cover and refrigerate for 2-6 hours (or more).  Stir before serving.


Photobucket

Monday, February 25, 2013

Nacho Potatoes

I could seriously eat 12 plates of these.  There's nothing particularly challenging or fancy about it, sometimes you just crave some comfort food.  What's not comforting about potatoes?  Mexican potatoes at that!  This dish is highly adaptable and can either be served as a main dish with maybe a bowl of soup, or as a side to nearly any meal.  As long as you don't use spicy chili powder (like I did!), it's sure to be a crowd pleaser, even for the little ones at your table.


Nacho Potatoes
from Keepin' It Kind

{Printable recipe!}

For the potatoes:
 3-4 heaping cups Yukon potatoes, sliced into 1/4-1/2-inch slices
 olive oil spray
 1/2 teaspoon cumin
 1/4 teaspoon smoked paprika
 salt and pepper to taste

 For the bean mixture:
 1 tablespoon vegetable broth
 1 tablespoon Bragg Liquid Aminos
 1 15oz. can black beans, rinsed and drained
 1 cup corn kernels (I used frozen and thawed)
 1/2 red bell pepper, chopped
 2 cloves garlic, minced
 1 teaspoon liquid smoke
 1 teaspoon cumin
 1/2 teaspoon smoked paprika
 1/2 teaspoon ancho chili powder
 juice of 1/2 a lime
 2 tablespoons fresh cilantro, roughly chopped (optional)
 salt and pepper to taste

 For the Nachos:
 1 cup shredded cheddar (vegan or not)
 1 tomato, chopped
 guacamole (use your recipe of choice, or store-bought)

Preheat the oven to 450. Line a baking sheet with parchment paper. Spread out your potato chunks and lightly spray with olive oil (or drizzle about 1      teaspoon of oil over them). Add spices and salt and pepper to taste. Toss to fully coat each piece. Roast in the oven for 20 minutes, flipping once.

While your potatoes are in the oven, cook your beans. In a large pan, combine the vegetable broth, Bragg Liquid Aminos, and garlic. Heat the pan over medium heat and add your black beans. Cook the beans in the liquid until the liquid begins to simmer, about two minutes, before adding the corn, the bell pepper, the chilies, the liquid smoke, and the spices. Turn the heat to low and cook the beans, stirring occasionally, until the liquid has cooked away. Squeeze in the lime juice, stir in the cilantro and add salt and pepper to taste. Remove from heat.

To assemble the nachos, portion out the potatoes on 4-6 plates.  Top the potatoes with equal portions of the black bean mixture, followed by the cheese, guacamole, and finally, the tomatoes.  Serve immediately.


Linking up to:


Photobucket

Thursday, February 21, 2013

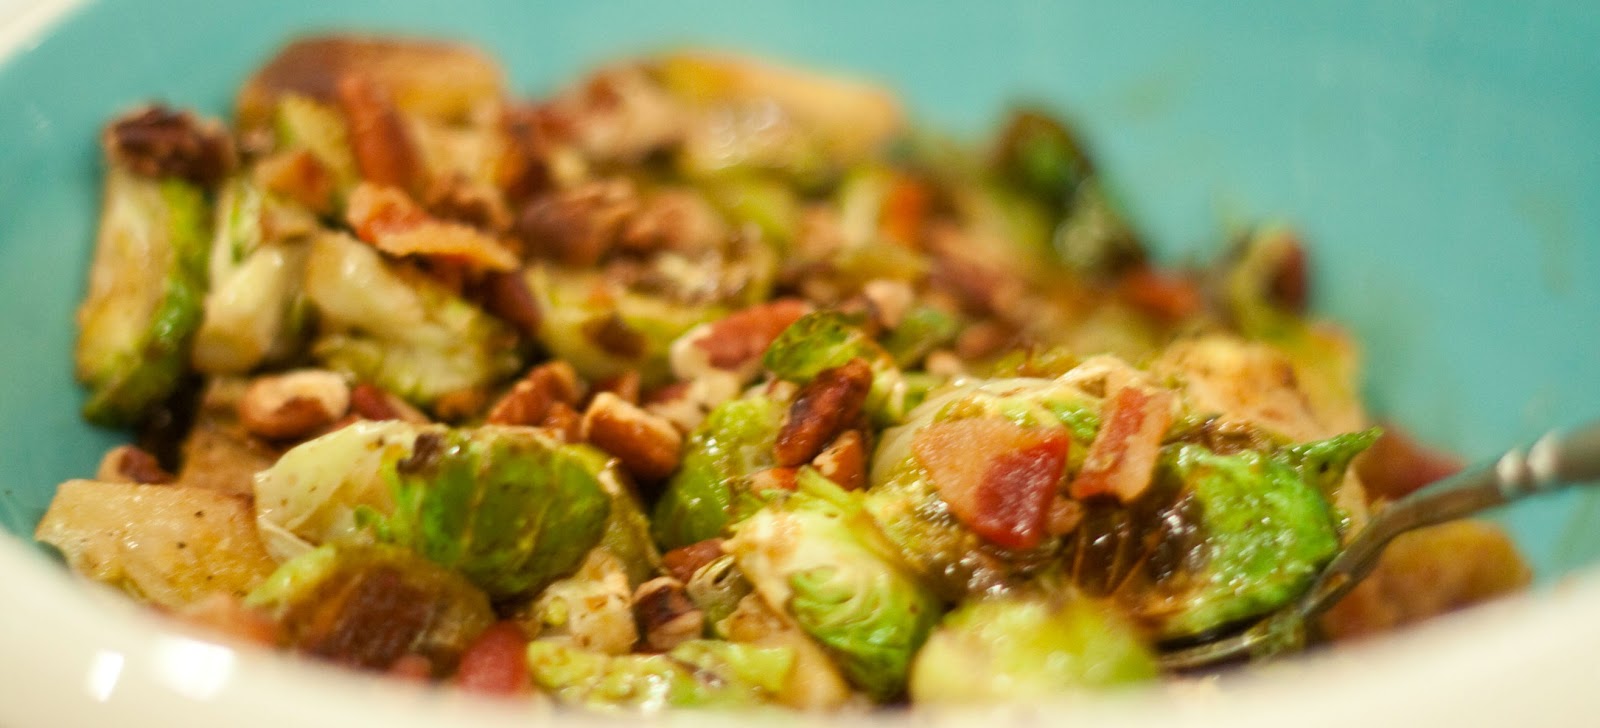
Caramelized Brussels Sprouts with Bacon & Pecans

Holy cow!  This one is a good one.  It's been a couple months since I made it and I still drool just thinking about these little morsels of goodness.  Even if you think you're not a Brussels sprouts fan, I strongly encourage you to give this one a whirl.  I think it would change your mind and leave you longing for more.  I just can't say enough about this dish.  If you try it (when you try it), let me know your thoughts.  It was a winner in our house for sure.

Caramelized Brussels Sprouts with Bacon & Pecans                                          
from Serious Eats                                             
{Printable recipe} 
Ingredients:
1/2 cup pecans
4 slices bacon
2 pounds brussels sprouts, halved (stems and ragged outer leaves removed)
3 tablespoons extra virgin olive oil
1 teaspoon kosher salt
1/2 teaspoon black pepper
2 1/2 tablespoons balsamic vinegar
1 tablespoon maple syrup

Directions:
Adjust oven rack to center position and preheat oven to 350°F. Line a baking sheet with heavy duty aluminum foil.

Place pecans on prepared baking sheet and bake until lightly toasted and fragrant, about 5 minutes. Keep a close eye on them, as they can burn fast. Transfer nuts to cutting board and chop coarsely. Set aside.

Increase oven temperature to 400°F. Lay the bacon strips out flat on the same foil-lined baking sheet, leaving space in between so they don't overlap. Roast for until bacon is crisp, 12 to 20 minutes, rotating half way (cooking time will depend on thickness of bacon). (Note:  This can also be done in a skillet on the stove, which is my preferred method.)  Transfer bacon to a plate lined with paper towels; pour rendered bacon fat into a small dish and discard aluminum foil. When bacon is cool, finely chop.

Increase oven temperature to 425°F. Line baking sheet with fresh aluminum foil. Toss brussels sprouts with 1-2 T. rendered bacon fat, olive oil, salt, and pepper, directly on baking sheet. Roast, stirring midway through to promote even browning, until brussels sprouts are tender and caramelized, about 20 minutes. Add balsamic vinegar and maple syrup and toss to coat evenly. Taste and adjust seasoning then transfer to serving dish. Right before serving, top with chopped pecans and bacon. Serve hot or room temperature.


Photobucket

Monday, February 11, 2013

Tuscan Bread Salad


If you're looking for a go-to salad for any family meal, dinner party, or special occasion, look no further than this salad.  It really is that good.  Each bite holds a special little treat and each bite is as flavorful as the last.  The bread cubes add the texture and help soak up the delicious tart vinaigrette.  The salad would pair nicely with an Italian entree, a sandwich, or even top it with grilled chicken or fish for a full meal.  I highly recommend this one!
Tuscan Bread Salad                      {Print this!}
from Jones Design Company
for the mustard vinaigrette:

2 T. red wine vinegar
1 t. Dijon mustard
1 t. minced shallots
1/2 t. chopped fresh thyme (or dried basil)
1/2 t. minced garlic
1/3 cup extra virgin olive oil
salt and pepper

for the salad:

1 loaf rustic bread, sliced 1 inch thick
extra virgin olive oil
24 oil-cured black olives, pits removed (optional)
1/2 pint cherry tomatoes, cut in half
6 ounces fresh mozzarella, sliced or cubed
4 cups loosely packed flavorful salad greens, such as mache, radicchio, arugula, spinach, romaine, endive, washed and dried, torn into bite size pieces
1/2 cup thinly sliced fresh basil
1/3 cup freshly grated Parmesan cheese
1/4 cup pine nuts, toasted
Freshly ground black pepper


Make the vinaigrette {I use a mason jar and shake to combine}. It will store in the fridge up to a week.

Liberally oil the slices of bread then grill on the grill or under the broiler until golden. Use a serrated knife to cut the bread into bite size cubes.

In a large serving bowl, put the bread in with the olives, tomatoes, mozzarella, Parmesan, pine nuts, chicken, basil and greens.  Pour vinaigrette over the salad and mix well.


Jam Hands 


Photobucket

Monday, January 21, 2013

Weekly Recipe: Wild Style Rice Salad


If you're following along with my weekly menu plan, this salad goes with the Garlicky Avocado Shrimp Sandwiches.  I wasn't able to link to a recipe, so I wanted to share it with you.  

It's a very interchangeable salad, where you can add and subtract nearly any of the ingredients and it will still turn out great.  For added nutrition, I do advise you to stick to the wild rice, as opposed to brown or white rice, but if you're opposed brown rice would also work.  (As a kid, I used to pick out every one of the black rice kernels!)


Wild Style Rice Salad

2 bell peppers (colors of your choice), seeded and diced
1 stalk of celery, chopped
2 green onions, diced
1/2 cup raisins
1/2 cup dry roasted, unsalted peanuts
1 cup uncooked wild rice

For the vinaigrette:
2 T. apple cider vinegar
1 tsp dijon mustard
1 tsp agave syrup (or honey)
1 tsp dried badsil
1 garlic glove, minced
1/2 tsp salt
1/4 tsp pepper
1/4 cup EVOO

Soak wild rice overnight, or at least 8 hours.  Drain.  Combine rice with 3 cups water in a medium saucepan.  Boil, then cover and reduce heat to low, cooking for 30 minutes.  Remove lid and drain the rice.  Allow to cool as you prep the remaining ingredients and dressing.

For the vinaigrette, combine all but EVOO in a jar.  Shake vigorously to combine.  Add EVOO and shake again.

Combine rice and the remaining salad ingredients in a large bowl.  Toss with vinaigrette.

Refrigerate for at least 30 minutes to allow flavors to meld.  You can make this a day ahead.

Serves 8-10.


Photobucket

Thursday, January 17, 2013

Weekly Recipe: Naan with Goat Cheese, Sauteed Chard, and Crispy Shallots

Remember when I actually used to post recipes?  Yeah, it's been a while.  You're probably starving and it's all my fault.  Please forgive me.  I have a great appetizer/side dish/bread in one to make it up to you. This is a great way to add some greens to your meal without having to have yet another salad.  Don't get me wrong, I love salads, but I also love variety!

This bread was inspired by a recipe in "Fast & Fresh Vegetarian" and I only slightly adapted it.


Naan with Goat Cheese, Sauteed Chard, and Crispy Shallots

3-4 pieces of naan bread, depending on size (Trader Joe's has my very favorite!)
1 bunch chard (any kind of chard or kale would work), washed and chopped into 1-inch pieces
1 large shallot, sliced thinly
2 T, plus 1 tsp olive oil
1 large garlic clove, minced
2-3 oz goat cheese, at room temperature
1/4 cup sun-dried tomato spread (mine was from a specialty store but you could substitute a pesto)
salt and pepper

Preheat oven to 350.

Heat 2 T. olive oil in a small skillet over medium-high heat.  Once the oil is hot, add the shallots.  Cook, stirring occasionally for 5-7 minutes, or until they begin to brown.  Remove to a paper towel lined plate.

While the shallots are cooking, heat 1 tsp olive oil in a large skillet.  Add the garlic and saute just until fragrant, about 30 seconds.  Add the chard and turn until it is incorporated with the garlic.  Place a lid over the pan and turn the heat to low.  Allow the greens to wilt completely.

Place naan on a baking sheet.  Heat in preheated oven for 5 minutes, or until warm.  Remove from oven and spread each piece with equal amounts of goat cheese.  Note: Doing this while the naan is still warm makes the spreading go a lot easier.  Spread about 1 T. of sun-dried tomato spread on each piece, on top of the goat cheese.  Divide the wilted chard amongst the naan and top with the crispy shallots.  


**Linking up to the What's Shakin' Link party.
Photobucket

Monday, December 17, 2012

Weekly Recipe: Green Bean Casserole

There are a few items I miss after cutting out processed foods (at least most of them).  Sometimes it's not so much the item, it's what you use the item to make.  I've always been a fan of green bean casserole, but Wes is not, so I haven't been tempted to make it very often.  Add to that the processed soups and it's just something I've had to wipe out of my cooking repertoire.  That is until I finally got around to making this Lightened Up Green Bean Casserole on How Sweet It Is.  
Holy cow!  It's every bit as delicious as I remember and even better because of the fresh ingredients.  I really appreciate the freshness of the green beans and mushrooms to really provide a good solid base for the dish.  One thing I recall about the Campbell's version was the mushiness of it.  It basically all just globbed together, but not so with this one.  I'd highly recommend adding this to your holiday table, or just a weeknight meal like we did.  I don't think you'll be disappointed.  
Lighted Up Green Bean Casserole
                                        
Click here for a printable recipe!
1 lb fresh cut green beans or haricot vert
2 tsp olive oil
1/2 onion, thinly sliced
1/2 tsp salt
1/2 tsp salt
1 T. butter
8oz cremini mushrooms, sliced
2 garlic cloves, minced
1 T flour
1/2-3/4 cup no-chicken chicken broth (Imagine brand)
1/2 cup low-fat half-and-half
pinch nutmeg
2 T. freshly grated Parmesan cheese
1/4 cup panko crumbs
Preheat oven to 400.
Heat a large, oven-safe skillet over low heat and add olive oil, onions, and a pinch of salt.  Stir well to coat, then cover and cook until onions are caramely, about 20 minutes, stirring occasionally - you may need to turn up your heat a bit if the onions are starting to change color.  While onions are caramelized, boil a large pot of water.  Once boiling, add green beans and cook 4-5 minutes, then drain and run cold water over top, letting sit in the sink to air dry until you're ready to use.
Once onions are caramelized, remove to a bowl for later use.  Add butter to skillet, then add chopped mushrooms and toss well to coat.  Cook for 6-8 minutes, until juicy and soft, then add in half of the onions and the garlic and cook 30 seconds.  Increase heat to medium-high and sprinkle flour over top.  Stir well to coat and distribute, cooking for 2-3 minutes.  Pour in broth and half-and-half.  Stirring constantly, let mixture come to a bubble, then let it cook 2-3 minutes until just slightly thickened.  You don't want it too thick since it will continue to cook and thicken in the oven.  Season with remaining salt, pepper, and nutmeg, and then stir in 1 T. Parmesan cheese.  Add green beans and toss well to coat.
Cover the top with remaining onions, panko, and remaining tablespoon of cheese.  Bake, uncovered, about 25 minutes, or until bubbly and bread crumbs are toasted.  
Serves 4-6
Halved fromHow Sweet It Is (adapted from Alton Brown)
Photobucket

Friday, November 16, 2012

Weekly Recipe: Southwestern Egg Rolls with Cheesy Amazing Mexi Rice

It's been a while but the kitchen is still up and running.  I'm learning to perfect the make-ahead meals in order to maintain my sanity.  Let's face it, it's not the easiest feat to pull off dinner in 30 minutes!  On the nights I have to pick up both children from school, I get home at 5:30, where they both act as if they've been living in a 3rd world country and are famished, hurriedly get them a snack, and I'm left with less than 30 minutes to cook and get a meal on the table by 6pm (a personal goal, not a hard-coded, combustible time).  

This meal was made almost entirely ahead of time and then tucked away in the fridge until I was ready to pop it in the oven and reheat.  The egg rolls would be a great accompaniment to a full meal, as an appetizer, or doubled up for a main entree as I did.  The rice makes enough for an army, so be prepared to freeze the leftovers or invite 10 of your closest friends to dinner that night!


Baked Southwestern Egg Rolls
source:  Annie's Eats


2 cups frozen corn, thawed
1 (15 oz.) can black beans, rinsed and drained
1 (10 oz.) package frozen chopped spinach, thawed and squeezed dry
2 cups shredded Mexican cheese blend
1 (4 oz.) can diced green chiles, drained
4 green onions, chopped
1 tsp. ground cumin
1/2 tsp. chili powder
1 tsp. salt
½ tsp. pepper
¼ tsp. cayenne pepper
1 package egg roll wrappers (about 24 total)

In a large bowl, combine everything but the egg roll wrappers.  Mix well to blend.  Lay an egg roll wrapper out on a work surface so that one of the corners is pointing toward you and place ¼ cup of the filling in the center.  Fold the tip closest to you up over the filling, roll a bit, then take the points pointing outward and fold them in toward the center.  Continue rolling into an egg roll shape until a small part of the remaining point is still free.  Dip a finger in water or beaten egg and lightly brush on the edges of the free corner.  Finish rolling and press to seal closed.  Repeat with the remaining wrappers and filling.

Preheat the oven to 425˚ F.  Lightly oil a baking sheet with cooking spray.  Place the sealed egg rolls on the baking sheet seam side down and spray the tops of the egg rolls with cooking spray.  Bake for about 15 minutes, or until lightly brown, turning halfway through baking.  Serve warm with salsa.

Cheesy Amazing Mexi Rice
source:  Emily Bites
4 c cooked brown rice (cooked the day before to save on prep time – recommended!)
6 oz (about 1 ½ c) shredded cheddar cheese 
1 green bell pepper, seeded and diced small
1 (14.5 oz) can petite diced tomatoes in their juices
1 c fresh or frozen corn
1 (2.25 oz) can of sliced black olives, minced (I omitted)
1 c canned black beans, drained and rinsed
1 c cooked chicken breast, shredded or diced – *omit if making this vegetarian*
2 t chili powder
2 t salt

Directions:
1.    In a large (really large) bowl, combine all the ingredients and mix together with a large spoon until thoroughly combined.
2.    Bring a large nonstick sauté pan (what I used) or cast iron skillet (do not use a stainless steel pan) over medium heat and add the rice mixture, spreading it out across the bottom of the pan. Let it sit and cook that way in five minute intervals, stirring in between. Do not stir more frequently than every five minutes – you are waiting for the cheese to caramelize before scraping it off the bottom of the pan! Scrape the cheese off the bottom and stir it in every five minutes for 35-45 minutes (I did the full 45).


Photobucket

Monday, September 17, 2012

Weekly Recipe: Three Bean Salad with Corn and Avocado


Oh summer how I'll miss thee.  With your sweltering 90+ degree weather, 100% humidity, and grass burning, crop stopping hot sun rays, I'm not too sad to see you go.  I will miss the bright colored florals, the leaves actually on the trees, as opposed to bare limbs, and most importantly, the summer vegetable bounty.  I'll gladly sacrifice those things for that crisp autumn air, beautiful fall foliage, and I'll even replace those delicious summer vegetables with squashes and gourds.  Summer, it's been nice, but it's time to move over for fall.  

Here's somewhat of a transitional side dish that will carry you over into fall.  Most of these veggies are available nearly year-round...at least at a price!

Three Bean Salad with Corn and Avocado
source:  Cooking Light

  • 1 cup halved heirloom grape or cherry tomatoes
  • 1 teaspoon salt, divided
  • 3 ears shucked corn $
  • 1 medium white onion, cut into 1/4-inch-thick slices
  • 1 jalapeño pepper
  • 1 tablespoon olive oil
  • Cooking spray
  • 1/3 cup chopped fresh cilantro
  • 1/3 cup fresh lime juice
  • 1 (15-ounce) can no-salt-added pinto beans, rinsed and drained $
  • 1 (15-ounce) can no-salt-added black beans, rinsed and drained
  • 1 (15-ounce) can no-salt-added kidney beans, rinsed and drained $
  • 2 diced peeled avocados
Preparation
  1. 1. Preheat the grill to medium-high heat.
  2. 2. Place the tomatoes in a large bowl, and sprinkle with 1/2 teaspoon salt. Let stand 10 minutes.
  3. 3. Brush corn, onion, and jalapeño evenly with oil. Place vegetables on grill rack coated with cooking spray. Grill corn for 12 minutes or until lightly charred, turning after 6 minutes. Grill onion slices and jalapeño 8 minutes or until lightly charred, turning after 4 minutes. Let vegetables stand 5 minutes. Cut kernels from cobs. Coarsely chop onion. Finely chop jalapeño; discard stem. Add corn, onion, and jalapeño to tomato mixture; toss well. Add remaining 1/2 teaspoon salt, cilantro, and next 4 ingredients (through kidney beans) to corn mixture; toss well. Top with avocado.


Linking up to What's Shakin' Link Party.
Photobucket

Wednesday, September 12, 2012

Weekly Recipe: Quinoa Salad with Watermelon & Feta

As summer is wrapping up, I wanted to squeeze in one (or more) last summer recipes.  I know seedless watermelons are still available, so I don't feel guilty about giving you a recipe with out of season ingredients.  This salad is light and refreshing but is also packed with powerhouse protein from the quinoa.  Quinoa is a superfood in my book, as it provides iron, protein, fiber, and has a low-glycemic index.  My kids love watermelon, so this was a great way to combine a great grain with a sweet fruit.  

Quinoa Salad with Watermelon and Feta
source:  Annie's Eats
3/4 cup quinoa
For the dressing:
2 T. apple cider vinegar
1 T. freshly squeezed lemon juice
3 T. chopped sweet onion
1/4 cup extra-virgin olive oil
salt and pepper
For the salad:
1/3 cup crumbled feta (or goat cheese)
1 cup watermelon, cut into 1/2-inch pieces
1-2 T. freshly chopped parsley
Lemon zest, to taste
Rinse and drain the quinoa.  Combine 1 1/2 cups water and quinoa in a small saucepan and bring to a boil.  Reduce heat and simmer, covered, for 15 minutes, or until the liquid is absorbed.  
To make the dressing, combine the vinegar, lemon juice, and onion in a small bowl or jar.  Mix well.  Add in olive oil and whisk well to emulsify the dressing.  Season with salt and pepper to taste.
In a serving bowl, combine the cooked quinoa with the feta, watermelon, and parsley.  Add lemon zest and salt and pepper to taste.  Toss with the dressing.  Serve chilled or at room temperature.
Linking up with Keep It Real Thursday at Beyond the Peel.
Photobucket

Thursday, August 30, 2012

Vegan Week: Spiced Tempeh Cauliflower Pilaf

Have you been inspired yet?  Or are you bored with my Vegan Week posts?  Are you craving a plate of greens, or are you still hungry for a hunk of meat?  Even if you're able to get a few new side dishes in your repertoire, I'm happy.  
I know it can be tough to get in 3 full cups of veggies each day but this pilaf is a good start!  If you're not a fan of cauliflower, I'd encourage you to try this dish because it's practically undetectable once all the other flavors and spices hit your tongue.  The peas provide a little hint of sweetness to complement the cinnamon, while the meatiness of both the tempeh and the cauliflower soak up the savory and salty flavors.  This could easily stand on it's own as a one-dish wonder but you can also pair it as a side to a piece of omega-3 rich salmon.
Spiced Tempeh Cauliflower Pilaf
adapted from: Veggie Num Num
3 T. avocado oil (or any oil you have on hand)
4oz tempeh, crumbled into bite-sized pieces
2 tsp mustard seeds
2 tsp tumeric
2 tsp paprika
1 tsp ground cinnamon
1/2 large onion, diced
2 tsp freshly grated ginger root
2 cups brown rice
2 cups no-chicken chicken broth
2 cups water
1/2 head of cauliflower, cut into small florets
1-2 cups fresh or frozen peas
1/2 cup raw cashews, roughly chopped
1/2 cup cilantro, roughly chopped
  1. Heat 2 tbs of the oil in a large frying pan over a medium-high heat, add the pieces of tempeh and fry for a few minutes until golden on all sides. Remove from the pan and drain on absorbent paper. 
  2. Add the remaining oil to the pan along with the mustard seeds and heat over a medium-low heat until the seeds begin to pop. Quickly add the turmeric, paprika and cinnamon and over a low heat combine the spices with the oil until you have a paste.
  3. Add the onion and increase the heat a little continuing to fry until the onion is soft. Add the ginger and cook for just a minute before adding the rice.
  4. Combine the rice well with the spices and onion, add the cauliflower and cooked tempeh and increase the heat. Add the stock and water and bring to the boil.
  5. Cover and decrease the heat to low, allow the pilaf to cook for about 20 minutes until rice is tender and stock nearly absorbed. Do not remove the lid but turn the heat off and allow the rice to sit 10 minutes. 
  6. Add the peas, stir through quickly and cover and cook for a further few minutes until stock is fully absorbed and rice cooked.
  7. Garnish with cashews and cilantro.  
  8. Serve warm accompanied with naan bread.

Linking up to Keep It Real Thursday at Beyond the Peel.

Photobucket

Tuesday, August 28, 2012

Vegan Week: Grilled Corn and Lima Bean Salad

One of my favorite summertime meals is to have a salad trio for dinner.  Side dishes have always been the highlight of the meal for me, so I love getting to have 3 (or more!) on one plate.  Summer is the perfect time for this because of the bounty of in-season produce   
This salad has no shortage of fresh veggies and is held together with a very light dressing.  It tastes like summer on a plate with the grilled corn, fresh basil and cherry tomatoes!  I failed to read the recipe all the way through and missed the step of refrigerating before serving but I actually preferred it a little warm.  You just have to roll with the punches because sometimes the best tasting things were discovered by pure accident.  
Grilled Corn and Lima Bean Salad
adapted from Southern Living
·          1 (16-oz.) package frozen lima beans
·         4 ears fresh corn, husks removed
          1 large red onion, cut into thick slices
·         1 large red bell pepper, cut into thick rings
·         3/4 cup vegannaise
·         3 tablespoons chopped fresh basil
·         1 garlic clove, pressed
·         1 teaspoon salt
·         1 teaspoon Worcestershire sauce
·         1/2 teaspoon freshly ground pepper
·         1 cup halved grape tomatoes 

1.  Cook butter beans (or lima beans) according to package directions; drain and cool completely (about 20 minutes).

2.  Meanwhile, preheat grill to 350° to 400° (medium-high) heat. Grill corn, covered with grill lid, 15 minutes or until done, turning every 4 to 5 minutes. (Some kernels will begin to char and pop.) At the same time, grill onion and bell pepper, covered with grill lid, 5 minutes on each side or until tender. Cool all vegetables completely (about 20 minutes).

3.  Cut kernels from cobs. Discard cobs. Chop onion and bell pepper into 1/2-inch pieces.

4.  Stir together vegannaise and next 5 ingredients. Stir in tomatoes, corn kernels, and onion and pepper pieces. Add salt to taste. Cover and chill 2 to 8 hours before serving. Store in refrigerator up to 3 days.

Linking up with Keep It Real Thursday at Beyond the Peel.
  
Photobucket

Tuesday, August 14, 2012

Weekly Recipe: Warm Chickpea Salad with Cumin and Garlic

One of the challenging aspects of eating a vegan diet is making sure you get enough (complete) protein.  We don't actually require as much protein as once thought, but even still, it's best to eat a varied diet to ensure you're getting enough of the essential amino acids found in protein.  
This side dish, or main dish, depending on your preference, is a great qualifier of both protein and a variety of nutrients.  A cup of chickpeas has roughly 30% of your required daily protein.  Add to that some vitamin K-packed cucumbers and vitamin C-packed sun-dried tomatoes, and you have a pretty well-rounded dish.   
My boys love chickpeas.  Colin loves to snap each one into his mouth, leaving the skin in his hand.  He forms a lovely pile of shells on his plate, reminiscent of a pile of snake skins.  
This dish is great served warm or cold.  We had it warm the first time around and cold in our lunch the next day.  It would be hard for me to pick my favorite.  I loved it both ways!
  
Warm Chickpea Salad with Cumin and Garlic
from:  The Kitchn
3 tablespoons olive oil
2 tablespoons whole cumin seeds (I used ground)
1/4 teaspoon dried red pepper flakes, or to taste
4 garlic cloves, finely minced
2 15-ounce cans chickpeas (garbanzo beans), rinsed and drained
1/2 cup oil-packed sun-dried tomatoes, drained and finely chopped
3/4 cup Italian parsley, leaves only
Small handful fresh mint leaves (I omitted)
1 lemon, zested and juiced
3/4 pound English cucumber (I used a traditional cucumber)
Flaky sea salt

Heat the olive oil in a heavy skillet (cast iron is nice) over medium heat. When the oil is hot, add the cumin seeds and crushed red pepper and cook over medium heat, stirring constantly, for about one minute or until the seeds are toasted. The cumin will turn slightly darker in color, and smell toasty.

Turn the heat to medium low and add the garlic. Cook, stirringly frequently, for about three minutes or until the garlic is turning golden. Do not let it scorch or turn brown.

Add the drained chickpeas and the chopped tomatoes and turn the heat up to medium high. Cook, stirring frequently, until the chickpeas are warmed through and are shiny with oil. Turn off the heat.

Strip any remaining stems away from the Italian parsley. Finely mince the parsley and the mint and toss this with the chickpeas. Stir the lemon juice and zest into the chickpeas.

Peel the cucumber and cut it in half lengthwise. Scrape out (and discard) the seeds with the tip of a teaspoon or grapefruit spoon. Dice the cucumber into small, 1/2-inch square cubes. Toss the cucumber with the chickpeas. Taste for salt. If necessary, add flaky sea salt to taste.

Serve warm or refrigerate for at least an hour before eating. 
Photobucket

Monday, April 23, 2012

The Secret Recipe Club: Red (Brown) Rice Salad

Can I just tell you how much I love secrets? I do. I love to be on both the giving and receiving end. I like to try to guess and I like the surprisee to guess too! It makes me feel like I've done a good job if my subtle hints are left undetected. CrAZy? Maybe but I think it's fun!

So this whole Secret Recipe Club is right up my alley. I love getting my assignment each month but I also love the anticipation of waiting to see who was assigned my blog.

This month I was assigned Gloria of The Ginger Snap Girl. Gloria is a baker at heart and participates in so many food clubs. I don't know how she finds the time to create all these masterpieces (Red Velvet Whoopie Pies anyone?!) but she does and her husband is one lucky dude!

When I read about a photography workshop she attended, put on by White on Rice Couple, and the Red Rice Salad that Diane served them, I knew that's what I wanted to try. That and I was so jealous of her awesome experience at the workshop! Gloria raved about the salad and even described the vinaigrette as "magical!" How could I not try it?!

Gloria was right! That vinaigrette would make shoe leather taste delicious. I'm sure of it. It's a little sweet, a little salty, and just the right amount of both. I whipped it up one night to jazz up some plain old brown rice (didn't even bother to look for the red rice since Gloria said it's hard to find) and my whole family raved about it. My husband looked so surprised when he tasted the first bite and said, "This rice is really good!" I take it my rice is typically bland!

I omitted the cucumbers because I made this on a whim (so unlike me!) and didn't have any available. I actually think I prefer the salad warm and therefore don't think cucumbers would be that great. The recipe says it can be served warm or cold and I can easily see adding various vegetables, depending on your temperature preference.

This will become a go-to addition to our boring brown rice. My husband thanks you, Gloria (and Diane)!

Red (Brown) Rice Salad
from The Ginger Snap Girl

For rice:

1 1/4 cups brown rice, uncooked
1 3/4 plus 2 T. water
1/4 cup freshly chopped parsley
  1. Put brown rice and water together in a pot with a lid.
  2. Set the heat to high, and bring the rice/water to a boil uncovered.  Then put the lid on the pot, and reduce the heat to low/simmer.  If your lid has a steam valve, keep it closed.  Let the rice simmer for 20 minutes.
  3. Turn off the heat, and let the rice sit in the covered pot for another 10 minutes.  It’s ok if you let the rice sit longer than 10 minutes (20 or 30 minutes is fine too), but don’t let it go any less.  I prefer my rice to be slightly chewy, not mushy, so I usually remove the lid after 10 minutes.
Shallot Vinaigrette:

3 large shallots, minced
3 cloves of garlic, minced
4 T. olive oil or grapeseed oil
2 tsp agave nectar (or sugar)
2 T. tamari or soy sauce
1 tsp sesame oil
1/4 tsp salt
1 T. rice vinegar
1 T. lemon juice
Freshly ground black pepper to taste

In a small non-stick skillet, add 2 T. oil and heat on low.  Add shallots and garlic and cook until mixture is a light golden brown (about 15 minutes).  Remove from heat and add in remaining 2 T. oil and remaining ingredients.  Stir until well blended.

When rice is finished cooking, add parsley and vinaigrette.  Stir to combine.  Serve warm or chill in refrigerator until ready to serve.

Serves 4-6 people as a side dish. 


Photobucket