Pages

Showing posts with label Bread. Show all posts

Friday, August 31, 2012

Vegan Week: Soft Honey Wheat Rolls


This may be a bit of a cop out for an actual vegan recipe, but it's more to prove my point that even everyday recipes can easily be turned vegan.  Besides adding the the whole grains, this recipe uses honey (for those vegans that use honey) instead of sugar, and vegan butter (such as Earth Balance).  I was pleasantly surprised how easy these rolls were to make and how great they tasted with the whole wheat flour added in. I've mentioned before that I have an issue with yeast, but I'm determined to overcome that fear and this recipe moved me one step closer to that goal.  They rose, they were light and airy, and they tasted a great - a trifecta in the baked goods world!


Soft Honey Wheat Rolls
source:  unknown
1 1/2 cup all-purpose flour
1 cup
 white whole wheat flour
3 tablespoons honey, divided
1 pkg. (1/4 oz or 2 1/4 tsp) active dry yeast
1/2 teaspoon salt
3/4 cup warm water (120 to 130 degrees)
2 tablespoon vegan butter, melted + additional 1 tablespoon to brush on rolls

In a large bowl, combine whole wheat flour, 1 cup all purpose flour, 2 tablespoons honey, yeast and salt. Add water and 2 tablespoons melted butter; beat on medium speed for 3 minutes or until smooth. Add additional 1/2 cup all purpose flour to form a soft dough.

Turn onto a lightly floured surface; knead until smooth and elastic, about 4-6 minutes. Shape into a ball, cover dough and let rest about 10 minutes. Divide dough into 12 pieces. Shape each into a ball. Place in a greased 9-inch round baking pan. Cover and let rise in a warm place until doubled, about 30 minutes.

Bake at 375 degrees for 11 - 14 minutes or until lightly browned. Combine 1 - tablespoon honey with 1 - tablespoons melted butter and brush on warm rolls before serving.
This concludes Vegan Week.  I hope you've gotten some ideas and if nothing else, I hope you've learned that eating a plant-based diet is not all that scary!  Just think how much your body would thank you for all those extra nutrients (:

Linking up to Keep It Real Thursday at Beyond the Peel.


Photobucket

Wednesday, July 18, 2012

Weekly Recipe: Blueberry Muffins


A few weeks ago we visited a nearby farm for their annual Blueberry Festival.  We've gone a couple times in the past and Colin always looks forward to it so that he gets to pick his own blueberries!  The timing couldn't be more perfect because it's always the last Saturday in June, meaning it's always near his birthday.  He likes to think they're throwing him a special blueberry birthday party and who am I to doubt him?!

This year we came home with more berries than ever before because I was determined to do more than just eat them by the handful.  I wanted to bake, freeze, blend, and pop a few in my mouth along the way.  Well, unfortunately the heat had other plans and while we still got more than last year, we weren't able to get enough to freeze.  

We did get enough to bake with and even though I voted for a pie, muffins won out by a landslide 3-1 vote.  Luckily, I had discovered my new go-to blueberry muffin recipe back in May for my Mother's Day brunch, so I was set.  This is really the only blueberry muffin recipe you need.  It's versatile in that I swap out at least half of the all-purpose flour with 50/50 white-wheat blend, I don't use quite as much sugar as called for, and the blueberries can either be fresh or frozen.  The best part is that you can whip up the batter ahead of time and then just bake up fresh, hot muffins whenever you want!  There's nothing better than a piping hot baked good!


Blueberry Muffins
  • 2 1/4 cups all-purpose flour
  • 1 1/2 tsp baking powder
  • 1/2 tsp baking soda
  • 1/2 tsp salt
  • 1/4 cup (4 tablespoons) unsalted butter, at room temperature
  • 3/4 cup granulated sugar
  • 2 large eggs
  • 2 tsp vanilla extract
  • 1/2 cup sour cream or plain yogurt
  • 1 1/2 cups blueberries, fresh or frozen
  • coarse white sparkling sugar for garnish (optional)
1) Preheat the oven to 375°F. Line a muffin tin with papers, and grease the papers.
2) In a medium-sized bowl, whisk together the flour, baking powder, baking soda, and salt, then set aside.
3) In a large bowl, beat the butter and sugar with a hand-held or stand mixer, until light, fluffy, and almost white in color. Start the mixer at low speed until the ingredients are incorporated, then gradually increase speed to medium-high until the desired color and texture are reached.
4) Scrape down the bowl to make sure all the butter is incorporated, then add the eggs one at a time, beating well after each addition.
5) Add the vanilla and sour cream or yogurt, and mix until incorporated.
6) Add the dry ingredients and mix on low speed just until the batter is smooth. It will be thick.
7) Fold in the berries by hand.
8) Scoop the batter into the prepared muffin cups, using a heaping 1/4-cup for each. Sprinkle with regular granulated or coarse white sugar, if desired.
9) Bake the muffins for 18 to 24 minutes, until a cake tester inserted in the center of one comes out clean. Remove them from the oven, cool in the pan for 5 minutes, then remove the muffins from the pan to finish cooling on a rack.

A few tips from King Arthur:
  • If you're using frozen berries, mix them into the batter while still frozen. They'll turn the batter a streaky blue color. They'll also increase the baking time by as much as 5 minutes.
  • Take the muffins out of the baking pan as soon as you can. Leaving hot muffins in the pan creates steam that will toughen the muffins as they sit.
  • To make handling baked muffins easier, use a potholder to tilt the hot pan at a 45° angle. The muffins will tilt enough that you can lift them out of the cups easily. Place them on a rack to finish cooling.
  • You can use any kind of fresh berry, dried fruit, diced peaches, bananas, or nectarines in this recipe. Canned blueberries are fine, but drain them well first and make sure you have 1 3/4 cups of berries.
  • Substitute a flavored yogurt, like vanilla or strawberry, in place of the sour cream


Photobucket

Tuesday, May 15, 2012

I hosted a little brunch for my mom and sister this year for Mother's Day.  Like me, breakfast is my mom's favorite meal, so I knew this would be the way to her heart!  It was nice to have everyone together, minus my dad and LC, and I think good times were had by all - certainly by the cousins!


It's hard to see the menu items from this picture but here's what was on the menu:

Blueberry Muffins (thanks Nicole!)
Pumpkin Scones
Roasted Asparagus with Roasted Cherry Tomatoes
Fresh Fruit with Granola topping
Frittata with Bacon and White Cheddar
Frittata with Red Peppers, Mushrooms, and Goat Cheese
Hash Brown Casserole (not worth repeating)
Mimosas
Fresh OJ
Southern Pecan Coffee


My sister and her beautiful girls!


And her handsome ham!


Our attempt at getting the whole family together.  I forgot to switch the setting to automatic for Wes, so it's a bit blurry, but a great photo nonetheless!


I hope you had a terrific Mother's Day as well!


Photobucket

Wednesday, December 28, 2011

Eggnog Two Ways

One of the tell-tale signs the Christmas season is upon us is when I spot eggnog in the grocery stores.  I can take it or leave it but Wes loves it.  Our Whole Foods has been known to keep a running sample station of it up around the holidays and you better believe Wes takes them up on their free sample every time he goes (and that's once a week for those of you keeping track, since he does the shopping).

Well this year was no exception.  The bartering began early and I caved pretty quickly.  He eagerly sipped that first glass and then it sat.  And sat.  All alone in the fridge.  Not being one to let it go to waste and see that money go down the drain, I set out to use every drop.

First, something the whole family could enjoy, Eggnog Waffles!  The eggnog flavor was there just enough to provide a little extra spice.  I had hoped to freeze some leftovers but alas, they were all eaten before I could stash any away.

The second recipe was more for my mom and I but when served with a breakfast for dinner meal, everyone eagerly gobbled up these Eggnog Scones.  I'm a biscuity scone lover.  I prefer the flaky layers to the coarse crumb texture and these fit the bill.  The eggnog flavor was more pronounced in these little treats than the waffles but that eliminated the need to adding any butter, jelly, or other condiment to them.  I opted to leave out the cinnamon chips and while I think they'd be a good addition, I really didn't miss them either.  I also made these the day before and froze them until I was ready to bake them for dinner the next night.


Both of these recipes were ones I'd want to make again.  You could probably get some eggnog on sale right now and whip up your own tasty treats! 

Eggnog Waffles
adapted slightly from Pink Parsley
  • 3/4 cup all-purpose flour
  • 1/4 cup cornstarch
  • 1/2 tsp baking powder
  • 1/4 tsp baking soda
  • 1/2 tsp salt
  • 2 tsp sugar
  • 1/2 tsp nutmeg (preferably freshly grated)
  • 1/2 tsp cinnamon
  • 1 cup eggnog (low-fat is fine)
  • 1/3 cup sunflower oil
  • 1 egg
In a medium mixing bowl, whisk together all the dry ingredients.  In a large mixing bowl, whisk together the wet ingredients.  Add the dry to the wet, and stir until just combined - be sure not to over mix!

Allow the batter to sit for 30 minutes.  Preheat the waffle iron and cook the waffles according to the manufacturer's instructions.  Serve immediately with maple syrup.

Eggnog Scones
adapted slightly from Tracey's Culinary Adventures

1 3/4 cups all-purpose flour

1 cup whole wheat flour
1/4 cup sugar
3/4 teaspoon salt
1 tablespoon baking powder
1/2 teaspoon ground nutmeg
1/2 cup (1 stick) unsalted butter, cut into small cubes
1 large egg
1 teaspoon vanilla extract
3/4 cup cold eggnog

Topping
1 tablespoon eggnog
1 tablespoon sugar

Combine the flours, sugar, salt, baking powder and nutmeg in the bowl of a stand mixer fitted with the paddle attachment. Add the cubed butter and mix on low speed until the mixture is crumbly and the butter pieces are roughly the size of peas (some may be slightly bigger or smaller, that's fine).

In a medium measuring cup, whisk together the egg, vanilla extract and eggnog. Add to the mixer bowl and beat on low speed just until the dry ingredients are moistened and the dough comes together - don't overmix.

Transfer the dough to a lightly floured work surface. Divide it in half and shape each half into a circle that's roughly 6 inches in diameter and 3/4-inch thick. You can either slice each circle into 6 wedges, or use a 2 1/4-inch round cutter to cut 6 rounds from each (you'll have to reroll the scraps if you go this route). Transfer your scones to a parchment-lined baking sheet. If you've cut rounds, put them close together (about 1/2-inch between them). If you've cut wedges, leave them in the circular shape and just slightly pull them from the center to separate the edges about 1/2-inch.

Brush the tops of the scones with eggnog using a pastry brush, then sprinkle with the sparkling sugar. Freeze, uncovered, for 30 minutes. Meanwhile, preheat the oven to 425 F. (Note:  If you are making these ahead, freeze on cookie sheet for 30 minutes then wrap individually and place in a freezer bag.  When ready to bake, preheat oven to 425 and proceed to next step.)

Bake for 20 minutes, or until the scones are golden brown and feel firm to the touch. Transfer the baking sheet to a wire rack and let the scones cool for a few minutes before removing them to the rack. Serve warm or at room temperature.

Makes 12 scones
Linking up to A Little Nosh and This Chick Cooks.

Monday, December 19, 2011

Secret Recipe Club: Parmesan Cornmeal Biscuits

There are so many wonderful food blogs out there but not nearly enough hours in the day to find them all.  Thanks to the Secret Recipe Club, I am fortunate enough to be introduced to a new one every month.  Sometimes I'm familiar with the blog but most of the time it's new to me.  I love getting to add new blogs to my Reader and this has proven to be a great way to find worthwhile sites.

This month I was assigned to Ann's blog, Sumptuous Spoonfuls.  Sumptuous is a such a luscious descriptive word and her photos and recipes fit the bill.  Ann is a self-proclaimed "health freak" and tries to cut the sugar and fat where possible.  Hello?  Are we twins?  I have personal mental guidelines that a recipe must adhere to before it ever gets bookmarked.  It was so nice to know that as I read through Ann's bounty of recipes, I didn't have to worry about a ton of butter, sugar, or additives.  If you can make things like Berry White Chocolate Scones and Magical Mystical Chocolate Pudding Cake with less sugar?  Sign me up!  I ended up settling on her Parmesan Cornmeal Biscuits.

I'm here to tell you, these biscuits are incredible.  I love the slight crunch from the cornmeal, mixed with the airiness of the flour.  I love that she used yogurt instead of milk or buttermilk.  I subbed Gruyere cheese in place of the parmesan and it proved to be a wonderful match!  They came together so quickly and were a smashing hit.  They got my bread-lovin' mom's seal of approval as well - and that's saying something!  I highly, highly recommend these versatile little gems.  I dare you to try to eat just one (:


Gruyere Cornmeal Biscuits
slightly adapted from Sumptuous Spoonfuls

1/2 cup all-purpose flour, plus more for dusting
1/2 cup 50/50 flour (white/wheat blend)
1/2 cup wheat flour
1/2 cup yellow cornmeal
2 T. sugar
2 1/2 tsp baking powder
3/4 tsp salt
1/2 tsp baking soda
5 T. chilled butter
1/3 cup freshly grated Gruyere cheese
1 large egg
1 cup plain low-fat or fat-free Greek yogurt

Directions:
  1. Preheat oven to 400 degrees F.
  2. Mix first 8 ingredients (flour through baking soda) in a large bowl.
  3. Cut butter into small bits and mix in with a pastry cutter, 2 knives or use your fingers to blend until butter is blended in and mixture is a coarse meal.
  4. Add Gruyere cheese and mix until blended.
  5. In a small bowl, whisk egg and yogurt until smooth.
  6. Add the egg/yogurt mixture to flour mixture. Stir well to mix into a moist, thick batter.  Add a little more flour if the batter is still really sticky.
  7. Turn the batter onto a well-floured surface and sprinkle with flour.
  8. Roll to 1/2 to 3/4 inch thick and cut into shapes.
  9. Bake at 400 for 15 – 20 minutes or until nicely browned on top.

Monday, November 28, 2011

Weekly Recipe: Quick Fluffy Yeast Rolls

It is possible to overcome your fears.  I inherited my mom's fear of baking with yeast but I was determined to not let it win.  My determination finally paid off!  Maybe we just hadn't found the right recipe or the right teacher.  I'm pretty sure I found them both with Tina's Quick Fluffy Dinner Rolls!


I have had this recipe bookmarked for nearly a year now and I'm just now getting around to conquering my fear.  What was I waiting for?  Tina has spelled out every step in the perfect kind of detail I needed.  She answered all the questions I've always had running through my mind as I've made other recipes in the past.  She even provides a YouTube video that shows how to properly roll the dough without touching it too much.  I'm here to tell you, if you follow her easy steps, this recipe is almost fool-proof!  I shouldn't make that claim until my mother tries it but it certainly turned out perfectly for me!

Quick & Fluffy Yeast Rolls
recipe:  Mommy's Kitchen


3/4 - cup milk
4 - tablespoons butter
3/4 - cup hot water
4 - tablespoon sugar
1 - teaspoon salt
4 - 4 1/2 - cup flour
1 - heaping tablespoon instant yeast

1. Pour your milk into a microwave safe container. Add your butter to the milk and put it in the microwave for 1 1/2 minutes.
2. While the milk warms preheat your oven to 170 degrees. Turn on the tap to get your water nice and hot. Temperature is important to making these rolls rise quickly. Put your hand in the water to test it. You want it to be just on the edge of unpleasant.
3. Put your milk/butter and hot water in the bottom of your Kitchen Aid Mixer. Add the sugar and salt. Then add 2 cups of flour...let it mix for 1 minute.
4. Add the yeast. Turn the mixer on and add the rest of the flour 1 cup at a time.
5. You have enough flour when the dough scrapes the side of the bowl clean. Mix on medium speed for 5 minutes.
6. Cover with plastic wrap and let sit for 5 minutes. You need the plastic wrap to trap the heat.
7. Take a stick of butter and coat the inside of a 9x13 pan.
8. Spray your counter, or a cutting board with cooking spray. Lay your dough on top of it.
9. Take a sharp knife, spray it with cooking spray and cut your dough into 12 pieces. Make them as equal as you can.
10. Gently round them into balls, and put them in your buttered 9x13 pan.
11. Put the pan into your warm 170 degree oven. Let them rise for about 20 minutes or until they have risen about 1 inch above the rim of the pan.
12. Leave your pan in the oven and turn the heat up to 350 degrees. Bake for 15 minutes (I baked mine an additional 7 minutes and they still weren't brown!  They were done, just not brown). This time includes the time it takes the oven to increase in temperature. Bake until golden brown.
13. Brush with a little softened butter and serve warm.

Total Time: about 1 hour 10 minutes

Sunday, November 27, 2011

The Thanksgiving That Never Was

Before you get all sad and weepy, I assure you my Thanksgiving was just fine.  No matter where I am, I have plenty to be thankful for.  The fact that we were all safe and healthy (relatively), is more than I could ever ask for.

On to the story.  Sawyer woke up at about 1 a.m. Thanksgiving morning.  I went in to quickly soothe him (we've recently reverted back to the cry-it-out method after some bad habits had started to develop).  I rubbed his back and noticed he was a bit warm but I didn't think too much about it.

Not 5 minutes after I left his room, he started crying again.  This time Wes went it.  Well Wes being the more phobic one of us, immediately felt his warm body and brought him in our room for me to feel him.  I played along and agreed he felt warm.  Wes was having no part of "warm," he was "on fire" and he began pacing nervously.  I rolled over - such a caring mother - and attempted to go back to sleep. 

I then hear Wes in the bathroom running water.  I deduce that he is getting a cold rag for Sawyer - just what you want when you're trying to go back to sleep!  Sawyer cries.  Surprise!  Feeling compelled to do something, I go and rifle through the drawer of random medicine.  I find a Tylenol equivalent and read the label.  "Children under 2; consult your physician."  Super.

At this point, the only thing I could think to do is let Sawyer sleep on me.  That may or may not have worked if Wes would have stopped rubbing his back every 3 minutes or so.  I know he was just a concerned parent but again, who wants to be rubbed when you're trying to go to sleep?!  After a few minutes of realizing this was going nowhere fast, I took Sawyer back to his bed.  He slept until 6:30 a.m.

Somewhere in the midst of all this, I mentioned to Wes that Sawyer and I might not be able to go with him and Colin to his parents' house.  He said, "We'll see."

Long story short, Sawyer and I opted to stay at home and let Colin and Wes make the trek by themselves.  I was going to have to come back that night anyway to go to work on Friday, so this actually seemed to simplify things a bit.  I told Colin we wouldn't be going, thinking he might be a little sad.  Wrong.  He said, "Ok" and went about his packing (that he had been working on for 3 days).

Sawyer and I enjoyed a great day of doing nothing.  I shouldn't say nothing.  While he took a marathon nap, I got to work in the kitchen making the one thing I knew I'd miss most about not going to Wes' family's meal - yeast rolls!  It should be noted that I have a love-hate relationship with yeast.  However, something came over me and I decided that I would win and I would be successful in making rolls.  You know, sometimes a positive attitude is all you need.

I couldn't stop on my yeasting frenzy.  I also decided to make Sweet Potato Cinnamon Rolls.  I was a baking fool and I loved every minute of it!  Additional posts to come with my delightful carb overload.

A local health food grocery store was having a Thanksgiving buffet and me and about 100 others decided that sounded just fine.  Take a look at this spread.  I was in heaven.  It was healthy...er and it had things I wasn't using to having on Thanksgiving - caramelized Brussels sprouts anyone?  Squash gratin?  Yum!


To round out my great meal, my yeast rolls were some of the best I've ever made.  Success!  And the cinnamon rolls weren't too shabby either.  And yes, I may have eaten both.  If ever there's a day for a free pass, this has to be the day.

I'm also happy to report that Sawyer is on the mend.  It looks like those pesky eye-teeth are to blame.  He was doing all sorts of crazy things with his tongue and I felt around in there and felt 2 little shards of glass breaking through on the top row.  Poor little guy.  I'll just have to make a post-Thanksgiving meal for him to enjoy (:

Thursday, February 3, 2011

Weekly Recipe: Caramelized Onion and Rosemary Rolls

Sometimes I take for granted that Wes and I have similar tastes.  Sure there are some things I love that he doesn't (think pumpkin!) and things he likes that I don't (think chicken wings) but for the most part, we'll eat just about anything and love to try new things.  First and foremost, I am thankful for that!  Secondly, it makes menu planning so much easier.

I had seen this recipe for Onion Rolls circulating in the blogosphere and after the second touting, I added them to our weekly menu.  Long story short, I loved them, Wes didn't.  He said he loves rolls and he loves caramelized onions but he doesn't like them mixed.  So you can either trust my taste buds or his but I was just proud they turned out because the dough was super sticky and it involved yeast.

The recipe does yield a dozen or more, so plan accordingly.  The original recipe says they freeze well and although I froze most of ours, I haven't tasted them to see how they held up.  Now that I look it up, I see it's the Pioneer Woman's recipe, so I think it's safe to trust her.  At least 10,000 other people do!

Caramelized Onion and Rosemary (minus the Rosemary) Rolls
originally from The Pioneer Woman Cooks , adapted by What's Megan Cooking, and further adapted by me

For caramelizing the onions:
1 Large Sweet Onion
1 tablespoon Butter
1 tablespoon Olive Oil
2 cloves Garlic, minced

For the Bread:
1 1/2 cup warm Water
3 teaspoons Active Dry Yeast
1 tablespoon Honey
3 tablespoons Olive Oil, plus more for coating bowl
2 cups All Purpose Flour
1 cup Whole Wheat Flour
2 teaspoons Kosher Salt

Sauté sliced onions and minced garlic in the 1 tablespoon of butter and 1 tablespoon olive oil over medium heat. Cook them until brown and caramelized, about 15 to 20 minutes. Allow to cool for a few minutes.

Pour warm water into a bowl and sprinkle the yeast on top. Add the honey and 3 Tbsp of olive oil. Stir gently with a fork and set aside until mixture is bubbly, 5-10 minutes.

In a separate bowl, mix together the flour and salt. Add the caramelized onions.  Add the yeast mixture to the flour and stir gently until dough is combined. It will be very sticky.

Generously flour a flat surface. Turn the dough onto your table and knead 15 to 20 times, adding flour generously to make it easier to handle. You might need to add quite a bit of extra flour. Add enough that it is able to be kneaded, but not too much - you want to the dough to still be somewhat sticky. Drizzle olive oil in a separate bowl and then add your ball of dough, turning to coat. Cover with a damp towel and place in a warm spot to rise for 1 1/2 to 2 hours.

When the dough has doubled in size, preheat oven to 400 degrees. Divide dough into twelve portions, forming each into a rough round shape. Place on a baking sheet lined with parchment paper, and cover with plastic wrap that has been sprayed with cooking spray. Allow to rise for 15 to 20 minutes. Bake the rolls for 18 to 20 minutes or until brown.

Makes 12 rolls. These freeze very well.

Wednesday, December 29, 2010

Hoarders

It hasn't been intentional but I've been hoarding a boat-load of recipes from you.  Most of them I didn't have a picture for and I decided not to post them.  Who wants a recipe without a picture?  Then I got to thinking that a lot of these were solid recipes and that I should at least mention them.  By now you've surely developed an opinion as to whether or not you trust my reviews.  I won't be disheartened either way because I know everyone's taste buds are different and not everyone enjoys the same taste and flavors that I do.  I'm fine with that.  Enough about my disclaimer, here is a list of some favorites we've had over the past month or so (most of the images have been hijacked from the respective sources).  I encourage you to try some of them and let me know what you think.  I'm always interested in the feedback.


Sweet Corn and Carrot Cornbread - I've made this several times and it is just delicious.  The carrots are a great way to sneak in another veggie for picky eaters.  They also add extra moisture, making this a super moist cornbread.


Balsamic Honey Chicken - I actually used maple syrup in place of the honey.  Maple syrup and mustard have quickly become my favorite flavor combination.  I use it in dressings, sauces, and marinades and it has never let me down. 


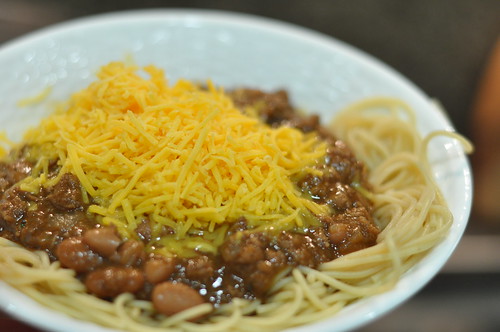
Cincinnati-Style Chili - For those of you that don't live in this region, Cincinnati-style chili has a very distinctive flavor.  I'd go so far as to say you either love it or hate it.  Luckily, Wes and I both love it.  This recipe tastes darn near close to the real thing.  Now if I can just figure out how to get that delicious cheese they use!


Sweet & Sour Meatballs - I think we liked the fried rice as much, if not more than, the meatballs.  The meatballs were good but not quite as saucy as her picture indicates.  Since the recipe doesn't indicate a quantity, I think we got 12-14, 1-2inch meatballs.


Savory Spinach, Feta, and Peppadew Muffins - It's been a long time since we've had these but I remember them being quite tasty.  I remember the spinach and peppadews taking a backseat to the feta.  I know I didn't use whole milk, as the recipe indicates but I can't recall any other changes.  The picture is actually of my finished product.


Lasagna Pizza Cups - We all really liked these, that is once Colin believed us that it was like pizza in a biscuit.  What kid wouldn't like that combination?!  So easy and quite delicious.  I paired it with a salad for a quick and easy week night dinner.

Quinoa and Pomegranate Salad - This is a great, nutritious side dish that goes with just about anything.  It's also very interchangeable with whatever you might have on hand.  Quinoa packs a lot of nutrients into a tiny grain and it cooks up very quickly.  I think the only modifications I made were to use the No-Chicken Stock (by Imagine) and I substituted maple syrup for the pomegranate molasses.  I may have doubled the amounts of the vinaigrette too.

Chicken Orzo Salad with Goat Cheese - This is an all-in-one kind of meal.  I love those on busy nights.  I substituted spinach for the arugula but kept the rest of the recipe as written.  This would also make a good summer dish because it's light.


Maple Mustard Pork Chops - I am not a huge fan of pork chops but this sauce made me a believer.  Wes couldn't say enough about how tasty the sauce was and we both agreed it would be great on chicken as well.  I really think it would be great on just about any protein for that matter.

Sweet Potato Rolls - These were my contribution to our Christmas Eve dinner.  I love that I was able to sneak a vegetable into some of my non-vegetable eating family members!  The rolls turned out great (they rose twice!) and the flavor of the sweet potato was undetectable.  It did make for a pretty, golden roll though.


RED BEANS AND RICE
Source:  John Besh from Comfort Food Magazine, Winter 2010
Serves 6

2 onions, diced
1 green bell pepper, seeded and diced
1 stalk celery, diced
2 T. rendered bacon fat
1 lb dried red kidney beans
2 smoked ham hocks (I only used 1)
3 bay leaves
½ tsp cayenne pepper
3 green onions, chopped (I omitted)
3 cups cooked basic Louisiana white rice (I used brown rice)

Cook the onion, bell peppers, and celery in bacon fat in a heavy soup pot over medium-high heat.  Once the onions become translucent, add the kidney beans, ham hocks, bay leaves, and cayenne, then add water to cover by 2 inches.
Increase the heat and bring the water to a boil.  Cover the pot, reduce the heat to low, and allow the beans to slowly simmer for 2 hours.  Periodically stir the beans to make sure that they don’t scorch on the bottom of the pot, adding water if necessary, always keeping the beans covered by an inch or more of water.  Continue cooking the beans until they are creamy and beginning to fall apart when they’re stirred.
Remove the ham hock meat from the bones, roughly chop it, and add it back to the pot of beans.  Stir in the green onions and season with salt, pepper, and Tabaso.  Serve with white rice.

*This is a stellar recipe.  I have made several other iterations of red beans and rice but none compare to this one.  I'm sure it was the ham hock that did it but whatever it was, we'll be doing it again and again.  Yum!

Green Beans and Tomatoes
Source:  Paula Deen Magazine Nov/Dec 2010
 ¼ cup olive oil
2 cups chopped onions
4 cloves garlic, minced
1 (2lb) package frozen cut green beans
2 cups chicken broth (I used No-Chicken Broth by Imagine brand - LOVE that stuff!!)
1 (14.5oz) can petite diced tomatoes (I actually omitted)
¼ cup chopped fresh parsley (I omitted)
1 tsp salt
½ tsp pepper

In a large Dutch oven, heat olive oil over medium-high heat.  Add onion and garlic, and cook for 6-8 minutes; stirring frequently, or until onions are tender.  Add green beans, chicken broth, diced tomatoes, parsley, salt and pepper.  Bring to a boil, reduce heat, and simmer, covered, for 25 minutes or until desired degree of doneness is reached.

*These were actually really good green beans.  I have a hard time making green beans that actually taste good without using 10 tons of salt or salted meat.  Surprisingly, these hit the spot.  I love that you can use frozen green beans and the finished product still tastes good.  I'd be interested to taste them with the tomatoes but Wes is somewhat averse to them, so I don't think I'll be making them that way anytime soon.  

Tuesday, October 26, 2010

Weekly Recipe: Pumpkin Cream Cheese Bread

Hello Pumpkin, I love you!  I adapted this recipe to incorporate some leftover cream cheese icing I had.  I mean, anything with cream cheese is always better, right?!  This was moist, perfectly pumpkin-y, and delicious!  Go make a loaf, or 12 today.

Here is the original recipe with my alterations added in red.

Pumpkin Cream Cheese Bread
 adapted from Allrecipes

  • 1 (8oz) package cream cheese (I used 6oz reduced-fat)
  • 1/2 cup white sugar  (I used 1 cup powdered sugar)
  • 1 tablespoon maple syrup
  • 1 tsp cinnamon
  • 1 tablespoon all-purpose flour
  • 1 egg
  • 1 2/3 cups all-purpose flour
  • 1 tablespoon orange zest (I omitted)
  • 1 teaspoon baking soda
  • 1/2 teaspoon salt
  • 1/2 teaspoon ground cinnamon (I increased to 1 tsp and added another 1/2 tsp nutmeg)
  • 1/2 teaspoon ground cloves (I used allspice)
  • 1/2 teaspoon pumpkin pie spice (I omitted)
  • 1 cup pumpkin puree
  • 1/2 cup vegetable oil
  • 2 eggs
  • 1 1/2 cups white sugar (I decreased this to 1 1/4 cups because of my cream cheese filling.)
  1. Preheat oven to 325 degrees F (165 degrees C). Lightly grease two 8x4 inch loaf pans.
  2. In a medium bowl, combine cream cheese, 1/2 cup sugar (1 cup powdered sugar in my case), 1 tablespoon flour, 1 egg and orange zest (cinnamon and maple syrup); beat until smooth. Set aside. Sift together 1 2/3 cup flour, baking soda, salt, cinnamon and allspice, cloves and pumpkin pie spice; set aside
  3. Place pumpkin, vegetable oil, 2 eggs and 1 1/2 1 1/4 cup sugar in a large bowl; beat well. Stir the pumpkin mixture into the flour mixture just until combined. Fold in the pecans if desired. Pour 1/2 of the pumpkin batter into the loaf pans. Spoon cream cheese mixture on top of this layer and then pour on the remaining batter.  I'm not sure if my pans were bigger than 8x4 or what, but it was all I could do to spread the batter thin enough for both loaves.  After the cream cheese layer, it's tricky to spread the pumpkin layer on top.  I found putting it on in small blobs worked best.
  4. Bake in preheated oven for 60 to 70 minutes (again, maybe because of my pans, my cooking time was less than 1 hour - maybe 45 minutes), or until a toothpick inserted into center of the loaf comes out clean. Cool bread in pans for 10 minutes before removing to a wire rack to cool completely.

Tuesday, March 30, 2010

Easter Dinner Ideas

We had our Easter dinner a little early at our house.  I knew we'd be at Wes' parent's house for Easter and I love any excuse for turkey, so we had it last week.  You know, turkey is one food that seems to be reserved for holidays but it's really quite versatile, easy, and always delicious.  Oven turkey is easy enough but when you're not home all day to babysit it, this crockpot variety is a delicious alternative.  It's actually more juicy and tender and retains more flavor that traditional oven baking.  The only downside is you don't have the crisp, delicious skin, or the wow-factor for presentation but I'll take taste over those 2 things any day.  The recipe is so easy; only 3 ingredients and you're good to go!  I plan to attempt my own Onion Soup Mix variation next time though because every option at the grocery had MSG and that's no good.  Don't worry if you don't like cranberry sauce, you don't actually eat it, it's just there for flavor and to keep the turkey moist.  Enjoy!
Cranberry Onion Soup Mix Turkey
Author:  Some genius on the interweb

3lb. turkey breast (frozen or thawed)
1 can cranberry sauce (jellied type)
1 envelope onion soup mix (dry)

Place thawed turkey breast in slow cooker.  Mix together cranberry sauce and soup mix and pour over top (spread).  Cook on HIGH for 2 hours, then LOW for 7 hours.  If breast is still frozen, cook on HIGH for 2 hours, then LOW for 10 hours or more.

*****

I have a love hate relationship with things that involve yeast.  I generally try to avoid them but every once in a while I get brave and declare I'm going to overcome my fears and anxieties.  You can't have turkey without yeast rolls, so I decided to give it another whirl.  I was pleasantly surprised how well these turned out.  I ended up halving the recipe but then forgot I was halving when it came time to divide out the rolls.  Oh well, they turned out fine, just a little small.  The recipe is called KitchenAid's 60 Minute Dinner Rolls and while it was pretty quick, I think it took a little longer than that.  Either way, it was a recipe worth keeping and trying again...with the right sized rolls!

Saturday, January 23, 2010

White Chicken Chili and Cornbread

It doesn't take me long to get adjusted to a new routine. Not searching for recipes and other new and different meal ideas has given me a much needed break. I must admit that it's kind of nice to come home and not have to run around the kitchen trying to figure out a new recipe in 30 minutes. I still love the idea of new and different menu items but at this point, I'm fine with just one of those a week. Knowing me, I'm sure that 1 will quickly increase to 2, which will turn into 3, etc.

Last week I finally braved chicken again. That has been one thing that I haven't been able to touch since November. I felt like I had conquered the world after cutting it up! I took full advantage and made enough for Chicken Pot Pie and White Chicken Chili.

I'm not sure why but White Chili has been showing up all over the blog world lately. I'm guessing the frigid temperatures might have something to do with it. Nonetheless, it caught my attention and got my craving level up - and you know what they say about pregnant ladies and their cravings! I don't either but I'm sure it's something bad. I read so many recipes but ultimately decided to just take bits and pieces of all of them to create something more suited for our tastes. Here's what I came up with.

White Chicken Chili
by Danielle

1 double chicken breast, cooked and shredded
1/2 cup diced onion
3 garlic cloves
1 T. olive oil
2 (14.5 oz) cans cannelloni beans, rinsed and drained
1 tsp cumin
1/2 tsp oregano
1/2 tsp pepper
1 tsp salt
4 splashes of hot sauce (I prefer Sriracha)
1 (4.5 oz) can diced green chiles
2-3 cups low sodium chicken broth, depending on the thickness you prefer
2 T. cornmeal
1/4 cup sour cream, plus more for garnish
shredded monterey jack cheese for topping

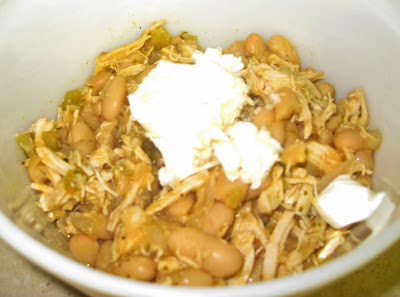
In a dutch oven, heat olive oil over medium-high heat. Add onions and garlic and cook until soft and transparent, about 5-7 minutes. Add chicken, beans and next 7 ingredients (thru stock). Simmer 25 minutes. As you stir, try to mash some of the beans with the back of your spoon to thicken the soup. Add cornmeal and mix well. Simmer an additional 10 minutes. Add 1/4 cup sour cream and stir to blend. Serve immediately with additional sour cream and shredded cheese.

Serves 4-6

To go with the soup, I made Art Smith's Cornbread. Art was Oprah's personal chef for years before opening his own restaurant in Chicago. His style is definitely southern comfort so I thought he'd surely know his stuff when it came to cornbread. The recipe was good but I wasn't blown away by it. I thought it could use a touch more sweetness and a little richer flavor (butter). It's a good, solid recipe though and would be great if you were looking to use it for cornbread dressing, cornbread salad, or something else that will later absorb moisture from the dish. I just love that I got to use one of my grandmother's iron skillets to make it!

Monday, January 11, 2010

Recipe Hiatus

You may have noticed the absence of recipes during the holidays and there was a good reason (still to come), I promise. I've still been in the kitchen, I just haven't been making any new things. It's been nice to not have to search for recipes but it's also been sort of sad to not get to try new things. I know Wes has appreciated getting some of the "tried and true" dishes of yesteryear but I'm ready for a change.

This weekend I broke the cycle and made some homemade biscuits. After finding this recipe and declaring my search was over, there was still a part of me that got googly-eyed every time I saw a recipe for delicious, flaky biscuits. I came across a recipe several months ago on Mommy's Kitchen of a Southern Living recipe. She echoed my same difficulties of making biscuits, yet declared this recipe to be a winner. With her step by step pictured directions, I was set. Mine still didn't turn out quite as puffy as I would have liked, I think the taste was there and I think I learned to just not roll them out as much next time. The concept of folding the dough on top of itself like a letter is brilliant and provides the air in between the layers that my kneading just does not. I'm anxious to keep tweaking this one to see if I can actually satisfy myself! By the way, if you don't already read her blog, she's a great southern cook and has lots of great recipes with great looking pictures!


Monday, October 12, 2009

Weekly Recipe Roundup

We (I) tend to go in phases at our house in terms of meals. One week I'm all about trying all new recipes and the next week I seek the tried and true ones we've had a dozen times. No matter which mood I'm in, I always try to incorporate at least 1 new recipe in the week's plan. I've got to get a handle on my ever-growing folder of recipes to try! It's become my goal to search through those first each week before I make my menu. I'm determined to weed some out and also find some stars amongst them all so I can pass them along to you. Awe, aren't I sweet?

Several months ago, a fellow friend of a toddler shared this recipe with me. She claimed it was quick and a crowd pleaser, which means it's a winner in my book. She was right! These Chicken and Corn Pies with Cornbread Crust were really good - much better than the reviews indicate on Southern Living. Colin is going through a strange phase where he doesn't like things mixed up, so I had to deconstruct his portion (such a sophisticated palate that child) and that seemed to work just fine. I used a box of Jiffy cornbread mix instead of the Mexican, subbed in fire-roasted tomatoes, and omitted the oil. I paired this with a black bean and rice salad which was not so hot and I'll save you the effort. A side salad would work just fine to add in that green vegetable.

I feel like my search for the perfect dessert never ends. I find one I really like but who wants to eat the same thing over and over again? I guess chocolate lovers probably disagree and would be perfectly content with eating that every day. Well not this weirdo, I don't like chocolate that much and substitute it every chance I get. These Nutmeg Cookies with White Chocolate were one of those times when I got to use white chocolate chips instead. These don't have a ton of sugar and somehow I didn't feel that guilty when I ate them. Because of that they're not overly sweet but the white chocolate chips take care of that. The recipe only yields 15 and they're so small, you could have those eaten in just a matter of days!


Dorie Greenspan is a legend amongst food bloggers. So much so that there's a group of bloggers that bake something different from one of her cookbooks each month. I haven't jumped on that bandwagon but I must admit the hype caused me to request the book from my public library - that's really saying something for me to request a book seeing as how I despise reading! Desserts, biscuits, breads, what's not to love?! I haven't had the chance to try many of her recipes yet because they tend to be a little more involved than I have time for.

I had an extra sweet potato and wanted to make sweet potato biscuits. When I found Dorie's recipe (by way of A Mingling of Taste), I just had to give it a try. I hardly think that equates to 1 cup fresh, as the recipe suggests, so that could be part of my problem. Mine didn't "puff" like the recipe said they were supposed to but that's not surprising because my biscuits never rise! I just noticed that the recipe I used was adapted from the original and that the original called for 2 (150z) cans of sweet potatoes. I hardly think that equates to 1 cup fresh, as the recipe suggests, so that could be part of my problem.The taste was good though, not overly sweet potato-ish but the recipe says the flavor enhances with time. I guess I'll find out at lunch tomorrow. These could easily pass as savory or sweet.

Thursday, September 10, 2009

Weekly Recipe Roundup

Calling all of you with a sweet tooth, this post is for you. I think I've become addicted to sugar and have to have a dessert now every night. The problem is, Wes and I have different loves when it comes to sweets. Wes loves anything chocolate, I don't. I love all things fruit related, Wes does not. I somehow feel less guilty about my sweet tooth if I can make him eat something too. Therefore, I've taken to either making 2 different desserts or just giving in and eating whatever he wants.

This week was one of those that I made 2 different desserts. For me, it was Peach Upside Down Cake. I've made many a Pineapple Upside Down Cakes but I think the cake on this one was one of the best. I've determined that I really like baking with buttermilk (or in my case, spoiled milk) because it really enhances the flavor and adds a depth that you just don't get with regular milk. The cake was not overly sweet and was moist but a little dense, which I love. This is a really versatile recipe and just about any fruit would work.

For Wes, although I did sample them as well, it was Marion Cunningham's Parker Brownies. If you love chocolate, these are for you. As the recipe says, they are thin, but that just means you can cut the squares bigger and not feel as guilty. This has to be one of the easiest brownie recipes I've ever made or read - one pot, that's it!

Second to sweets is anything breakfast related. I'm determined to make Bob-Evans-style-biscuits but I'm not willing to use Crisco or more than 1 stick of butter. I'm not thinking I'm going to be too successful based on those limitations but I continue to try. These Buttermilk Biscuits came with step-by-step instructions and although I had to make some adjustments, the flavor was really good. They still didn't rise like I wanted (darn it) but at least the flavor was there. I covered them up with gravy anyway, so I guess it really shouldn't matter. I just looked at her picture again and hers didn't rise much taller than mine. I'm still searching though.

To go with said biscuits, I made a frittata. I love quiche but I don't like the added calories of the crust or the limitations it puts on the rest of the meal in terms of additional carbs. A frittata is the perfect compromise for me because you can still dump the kitchen sink in there and it tastes just as good as a quiche. You really can't go wrong with your add-ins but for this particular one was a great medley of flavors and complexity. I generally go with whatever I have in the fridge and this time it just worked.

Breakfast Frittata
7 large eggs
1/4 whole milk (skim would work as well)
2 oz goat cheese, crumbled
5 button mushrooms, quartered
1 small red pepper, chopped
2 tsp butter
1 large shallot, chopped
1/2 tsp salt
1/2 tsp pepper


Preheat oven to 350. Melt butter in large skillet over medium-high heat. Add shallot and saute until softened, about 5 minutes. Add chopped red pepper and mushrooms and continue to saute until softened, about 4-5 minutes more.

In a bowl, whisk eggs with milk, salt and pepper. Pour into skillet and top with crumbled goat cheese. Cook on medium heat for about 5 minutes, just until the edges begin to set.

Transfer the skillet to the oven and continue to cook for 18-20 minutes, or until the middle is set. Slice into 4-5 wedges.

Secret Recipe Club